An over-engineered TV remote holder system

Despite my best efforts, my TV setup has 5 remotes. 99% of the time you just need the main TV remote, but sometimes you need to turn on the fan or set the speakers to Bluetooth mode or something, then you need one of the other guys.

I mulled many, many perfectly fine solutions to this very easy problem, and rejected all of them for not being perfect. You see, I wanted a system that would:

  • let me reorganize the remotes as things changed,
  • not make me have to drill new holes in the side table every time,
  • not rely on adhesives,
  • feel rigid (ruling out command strips, velcro, and dual-lock), and
  • hold the remotes tightly together.

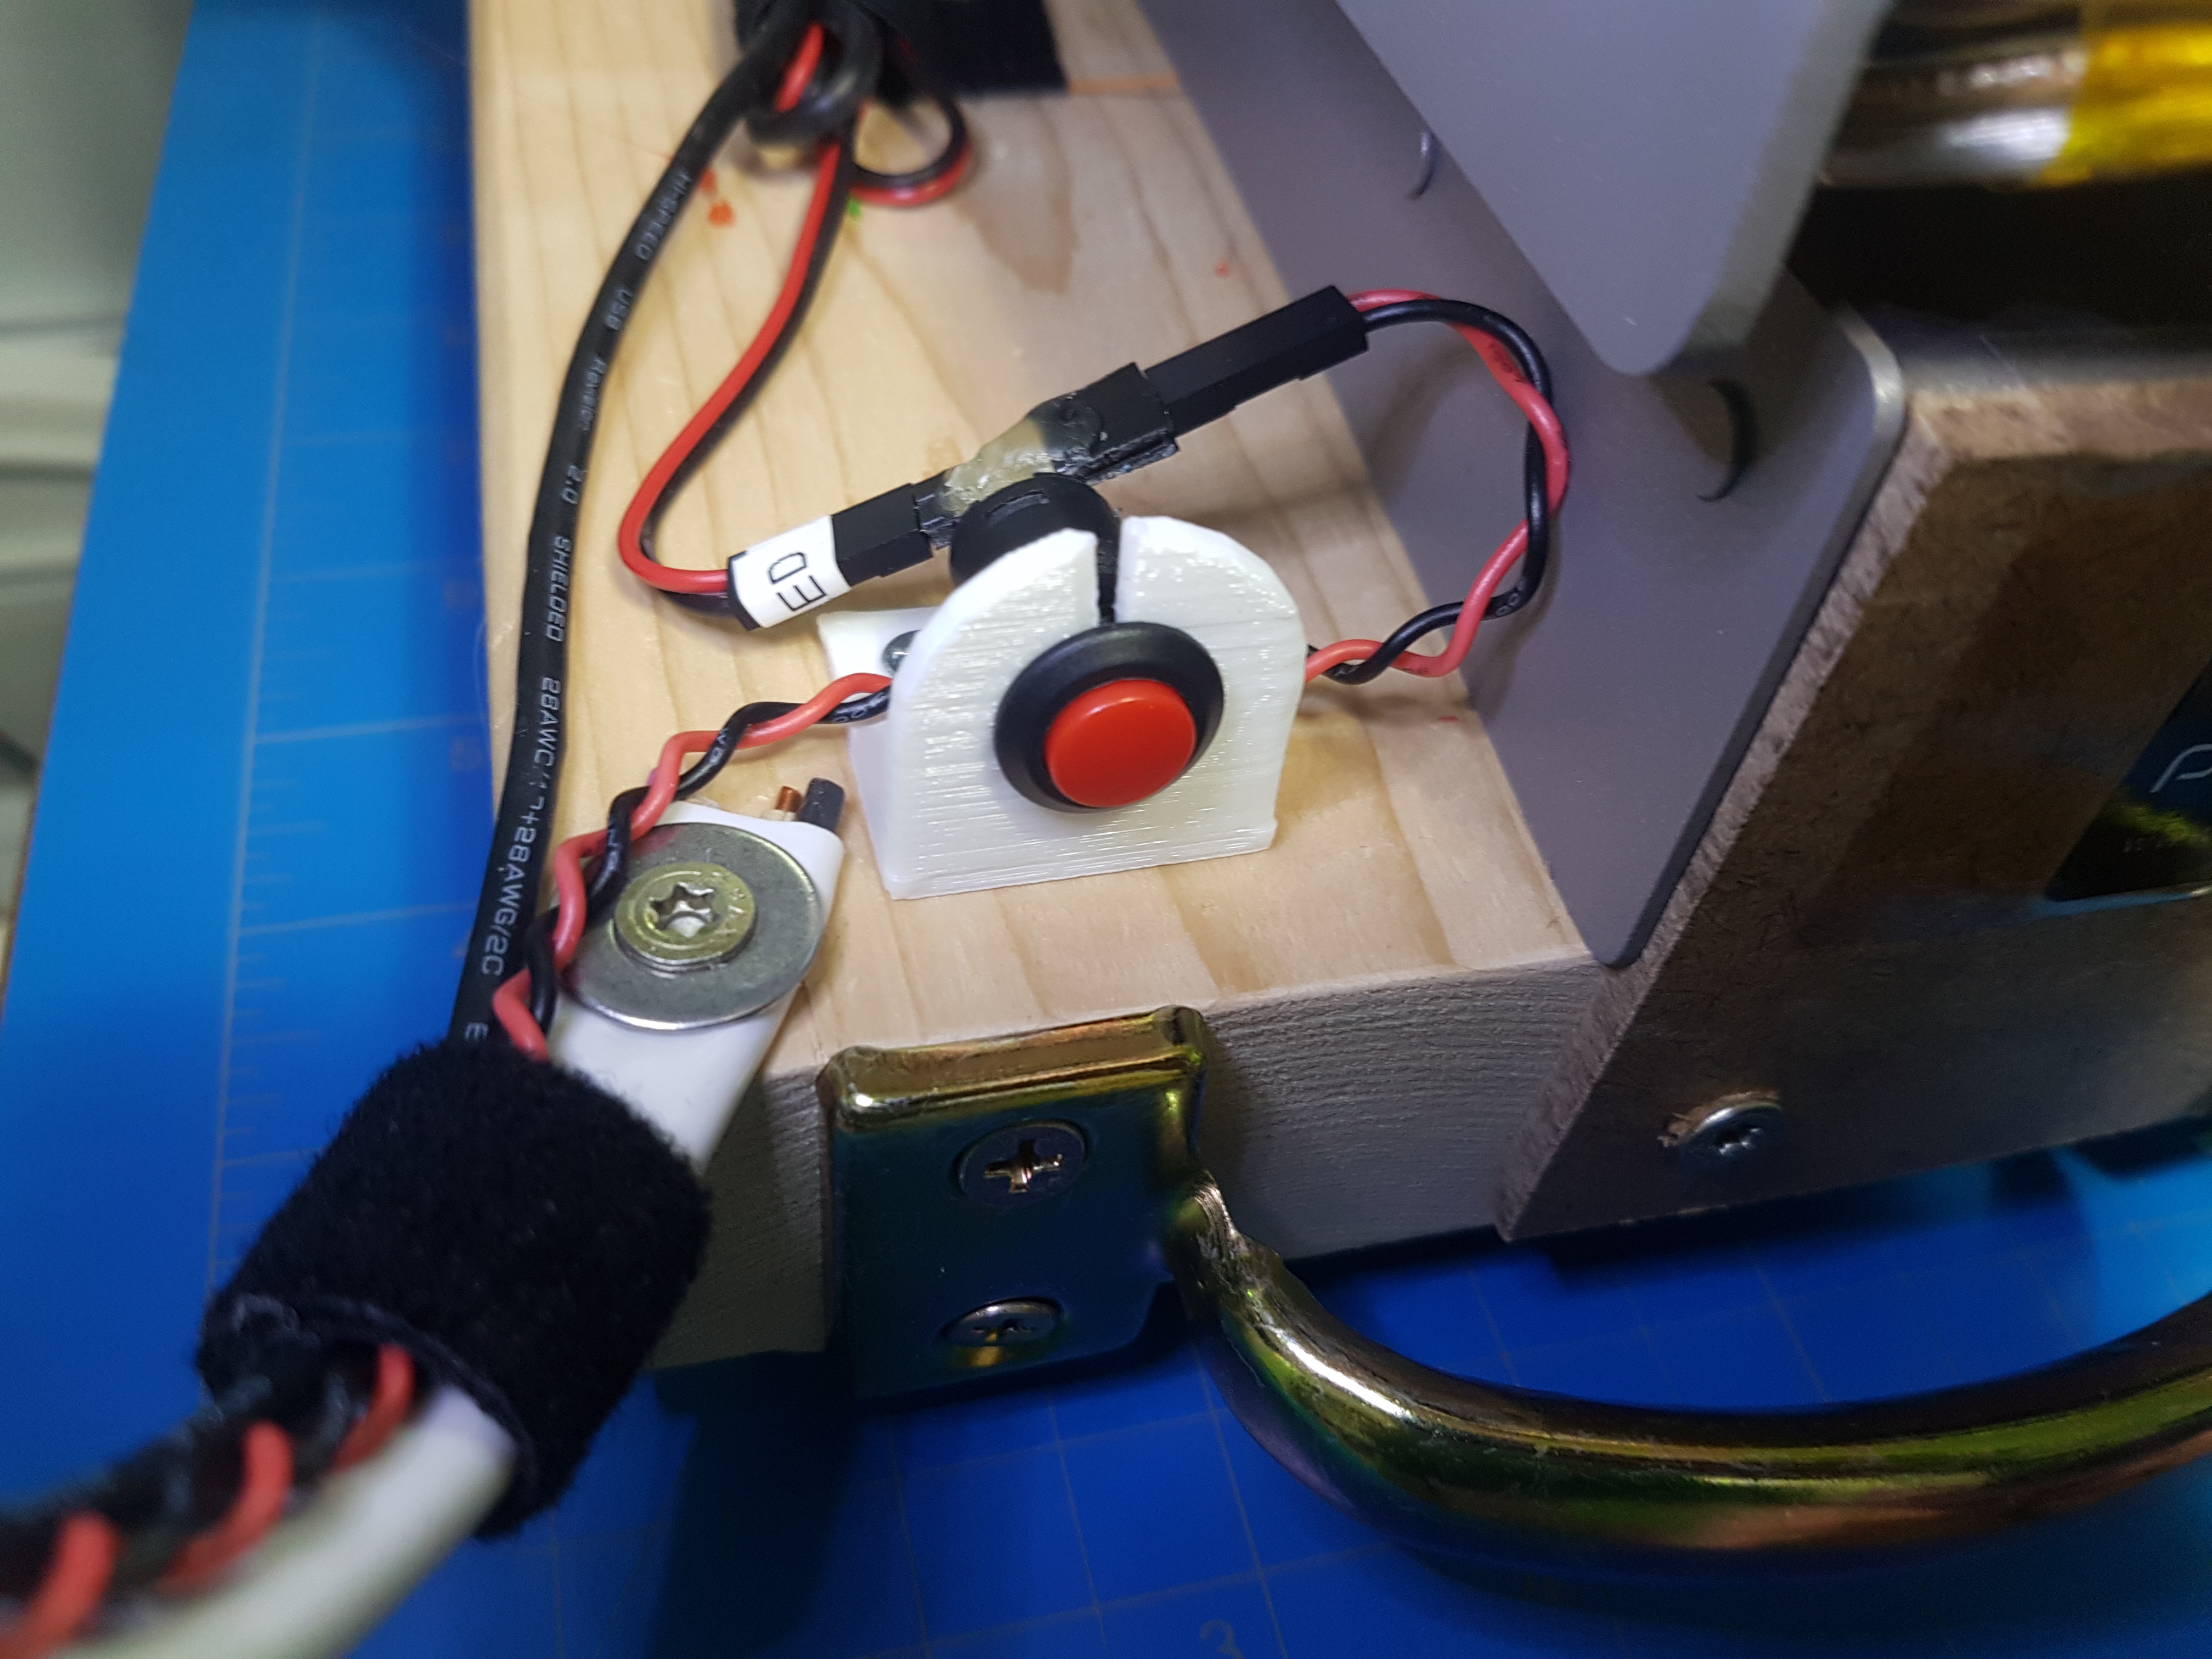
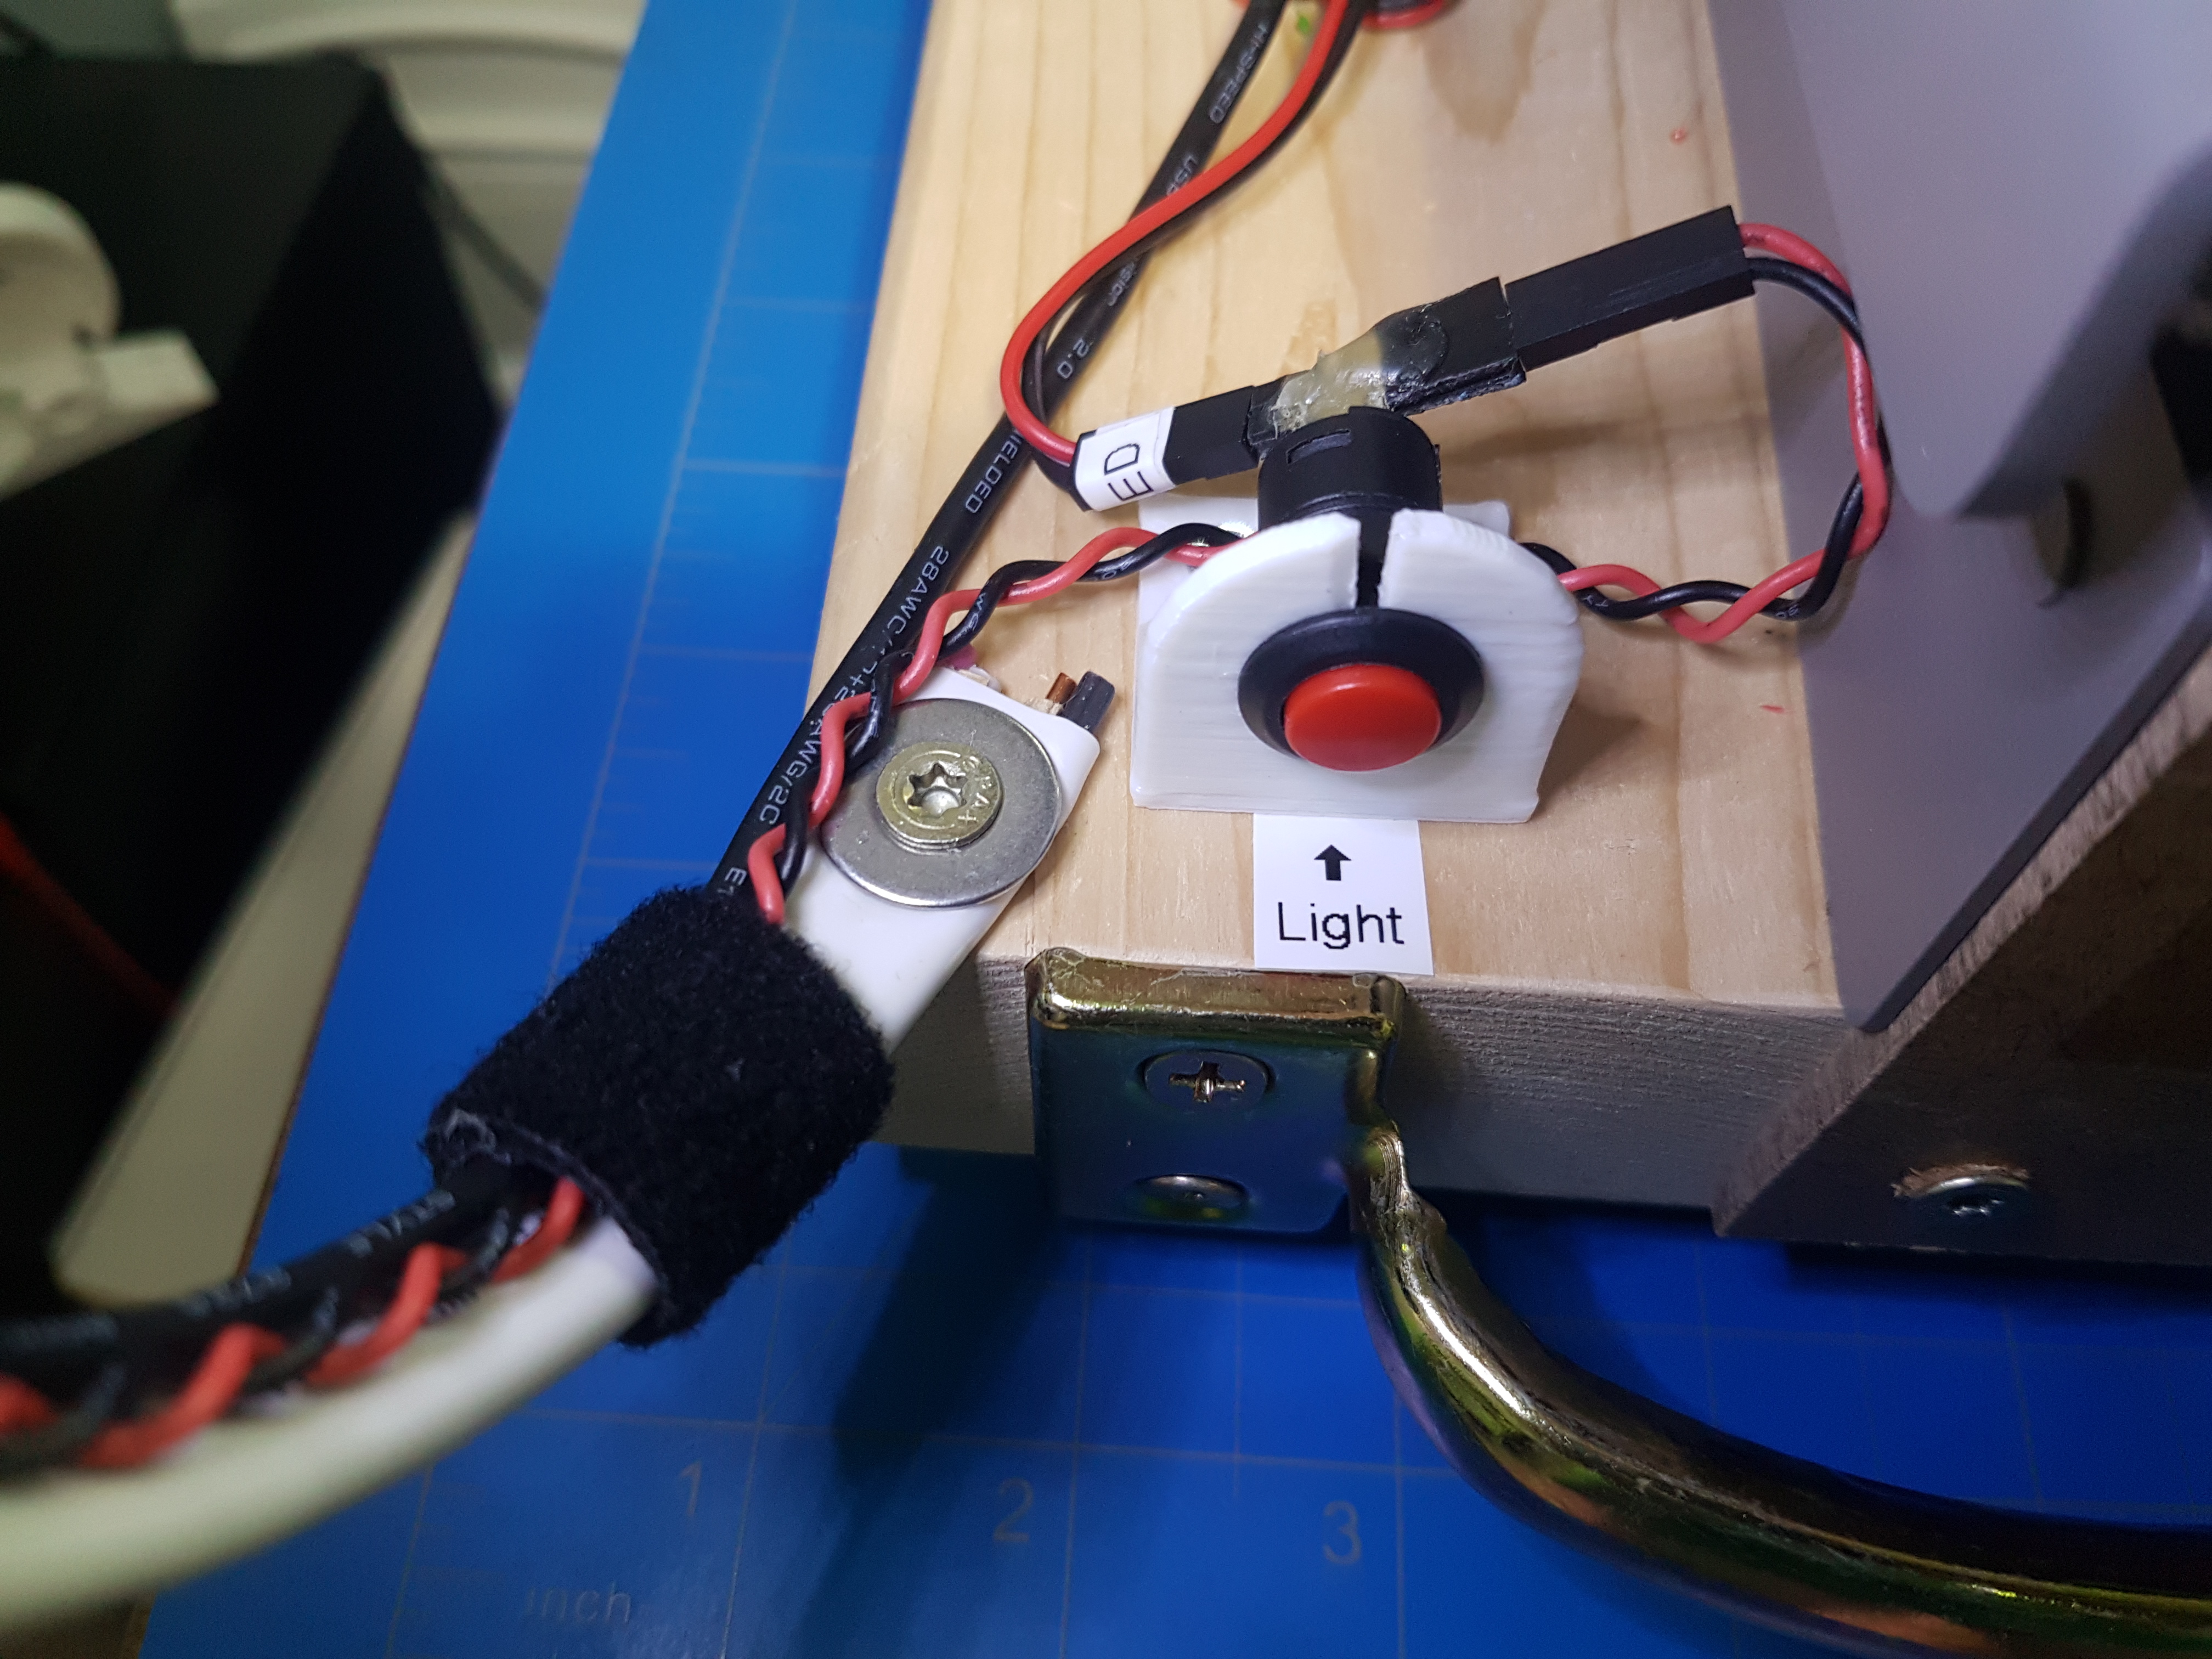
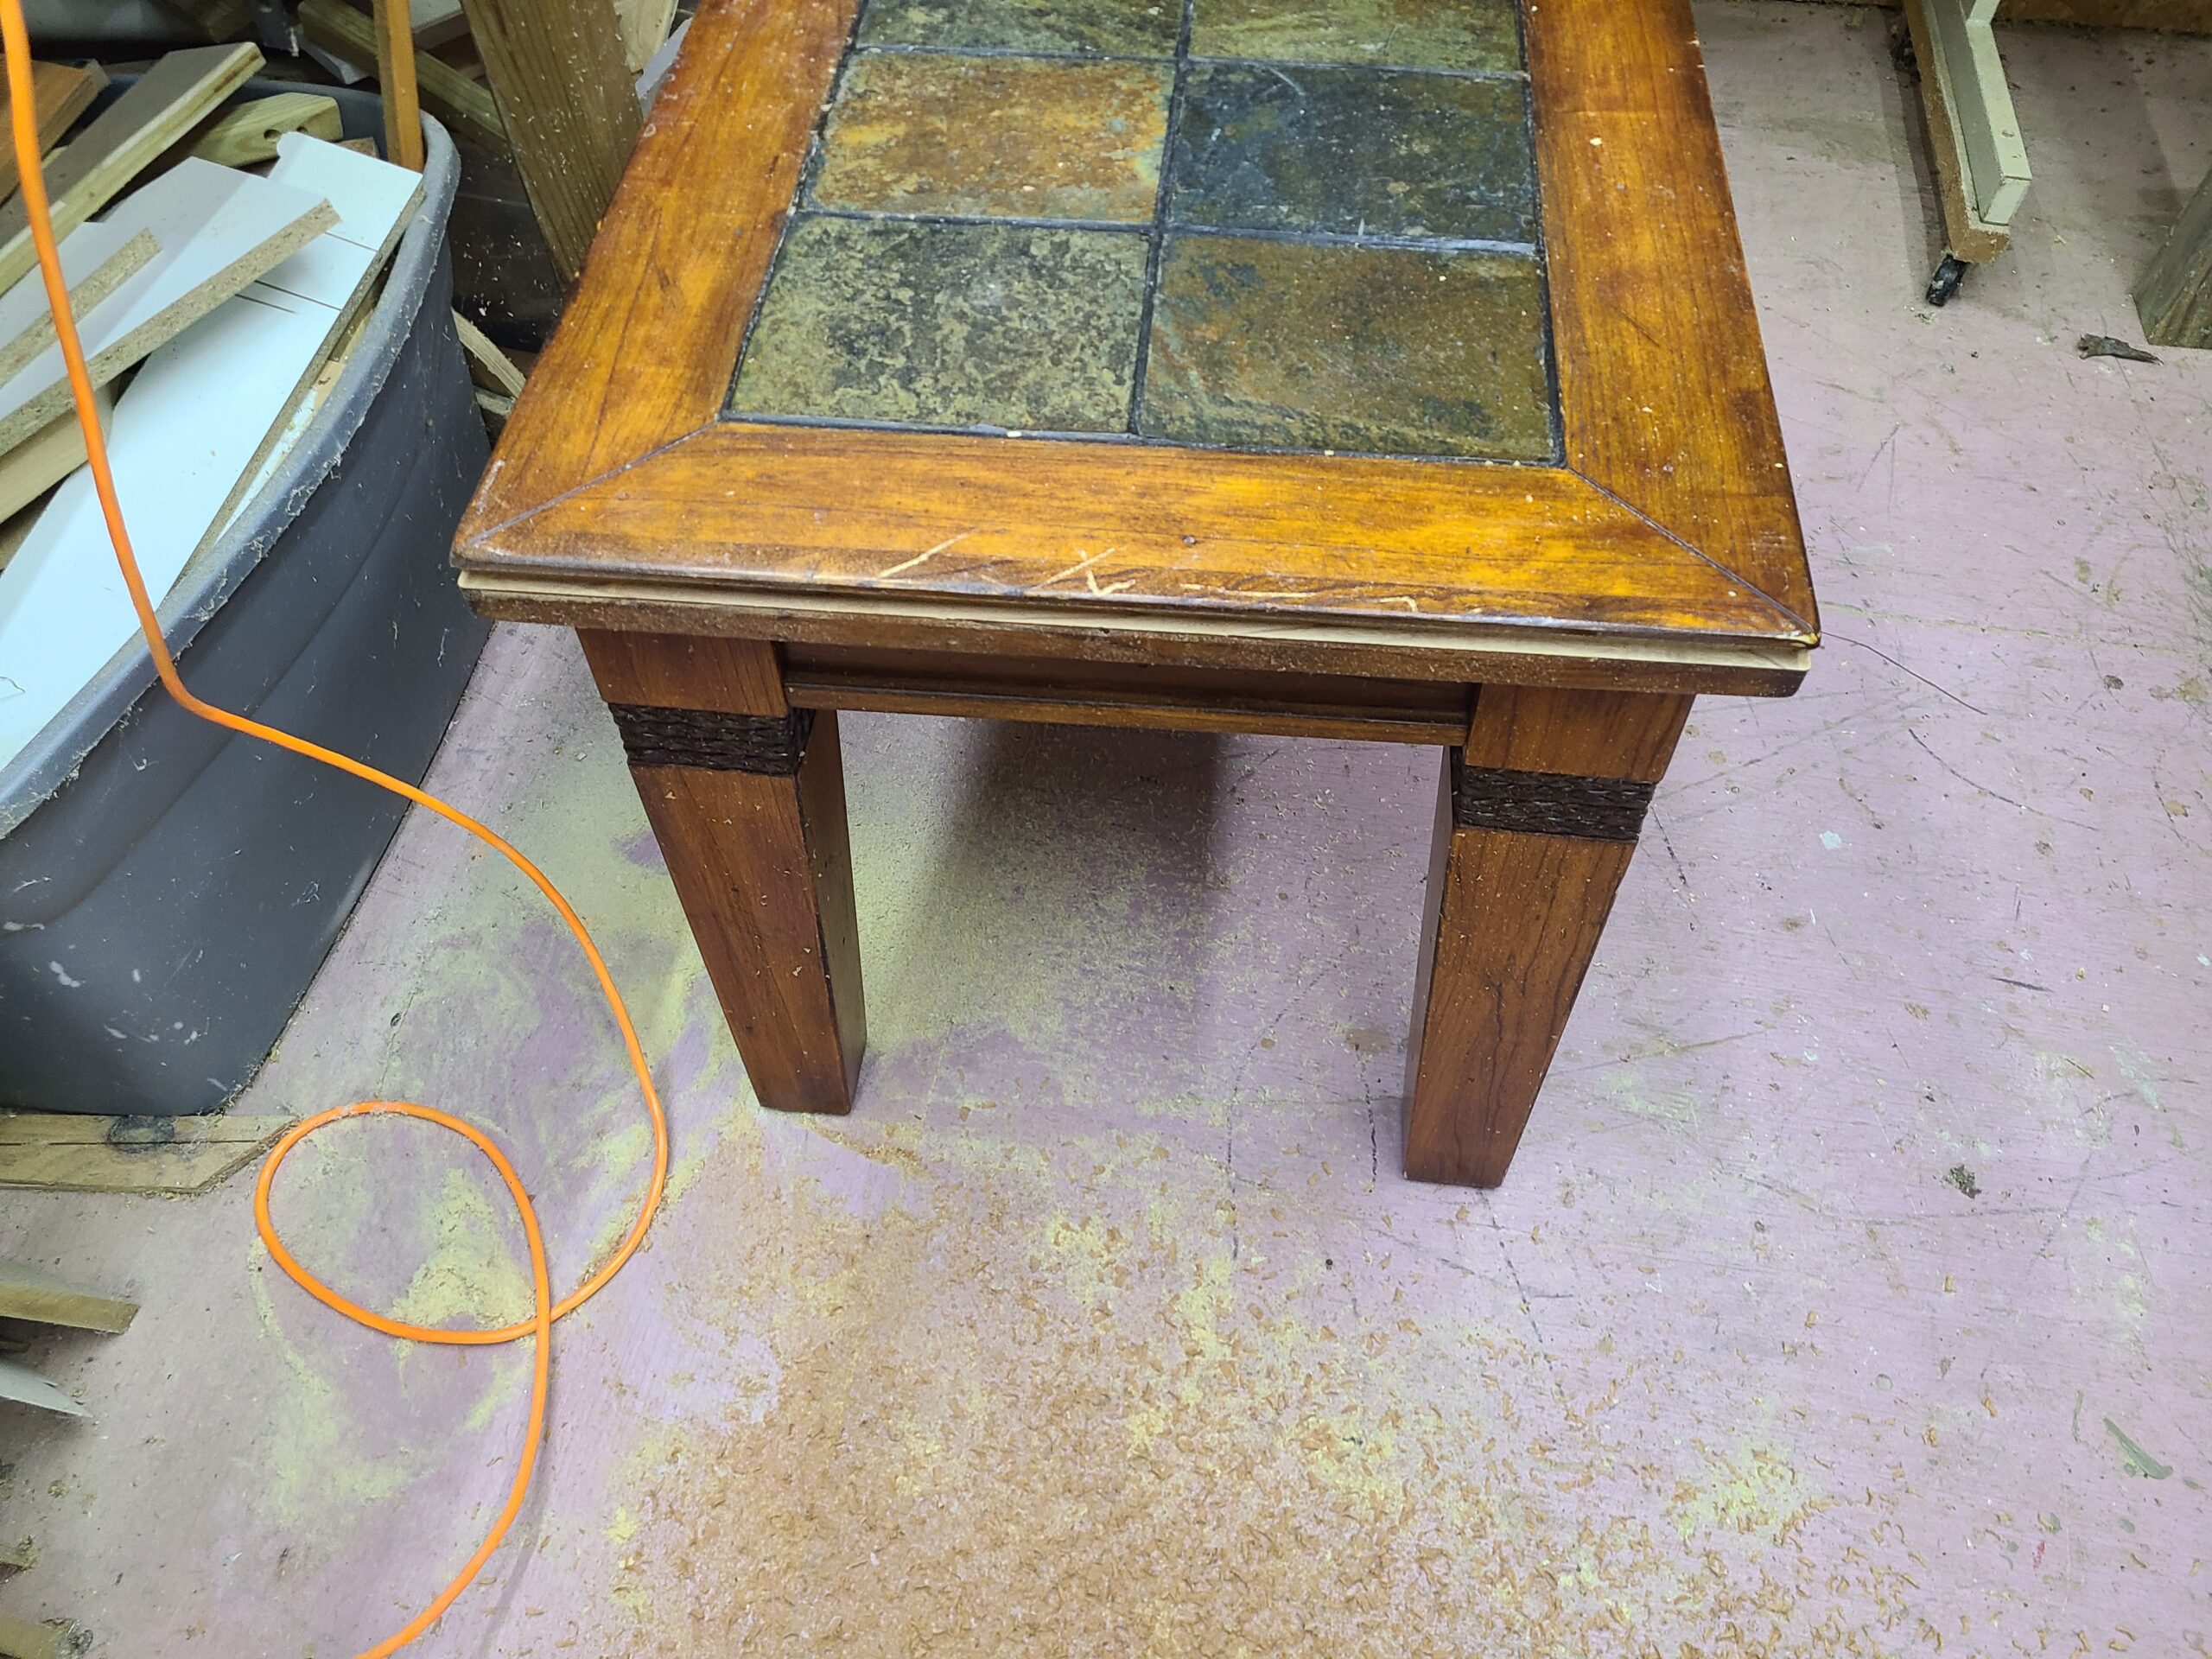
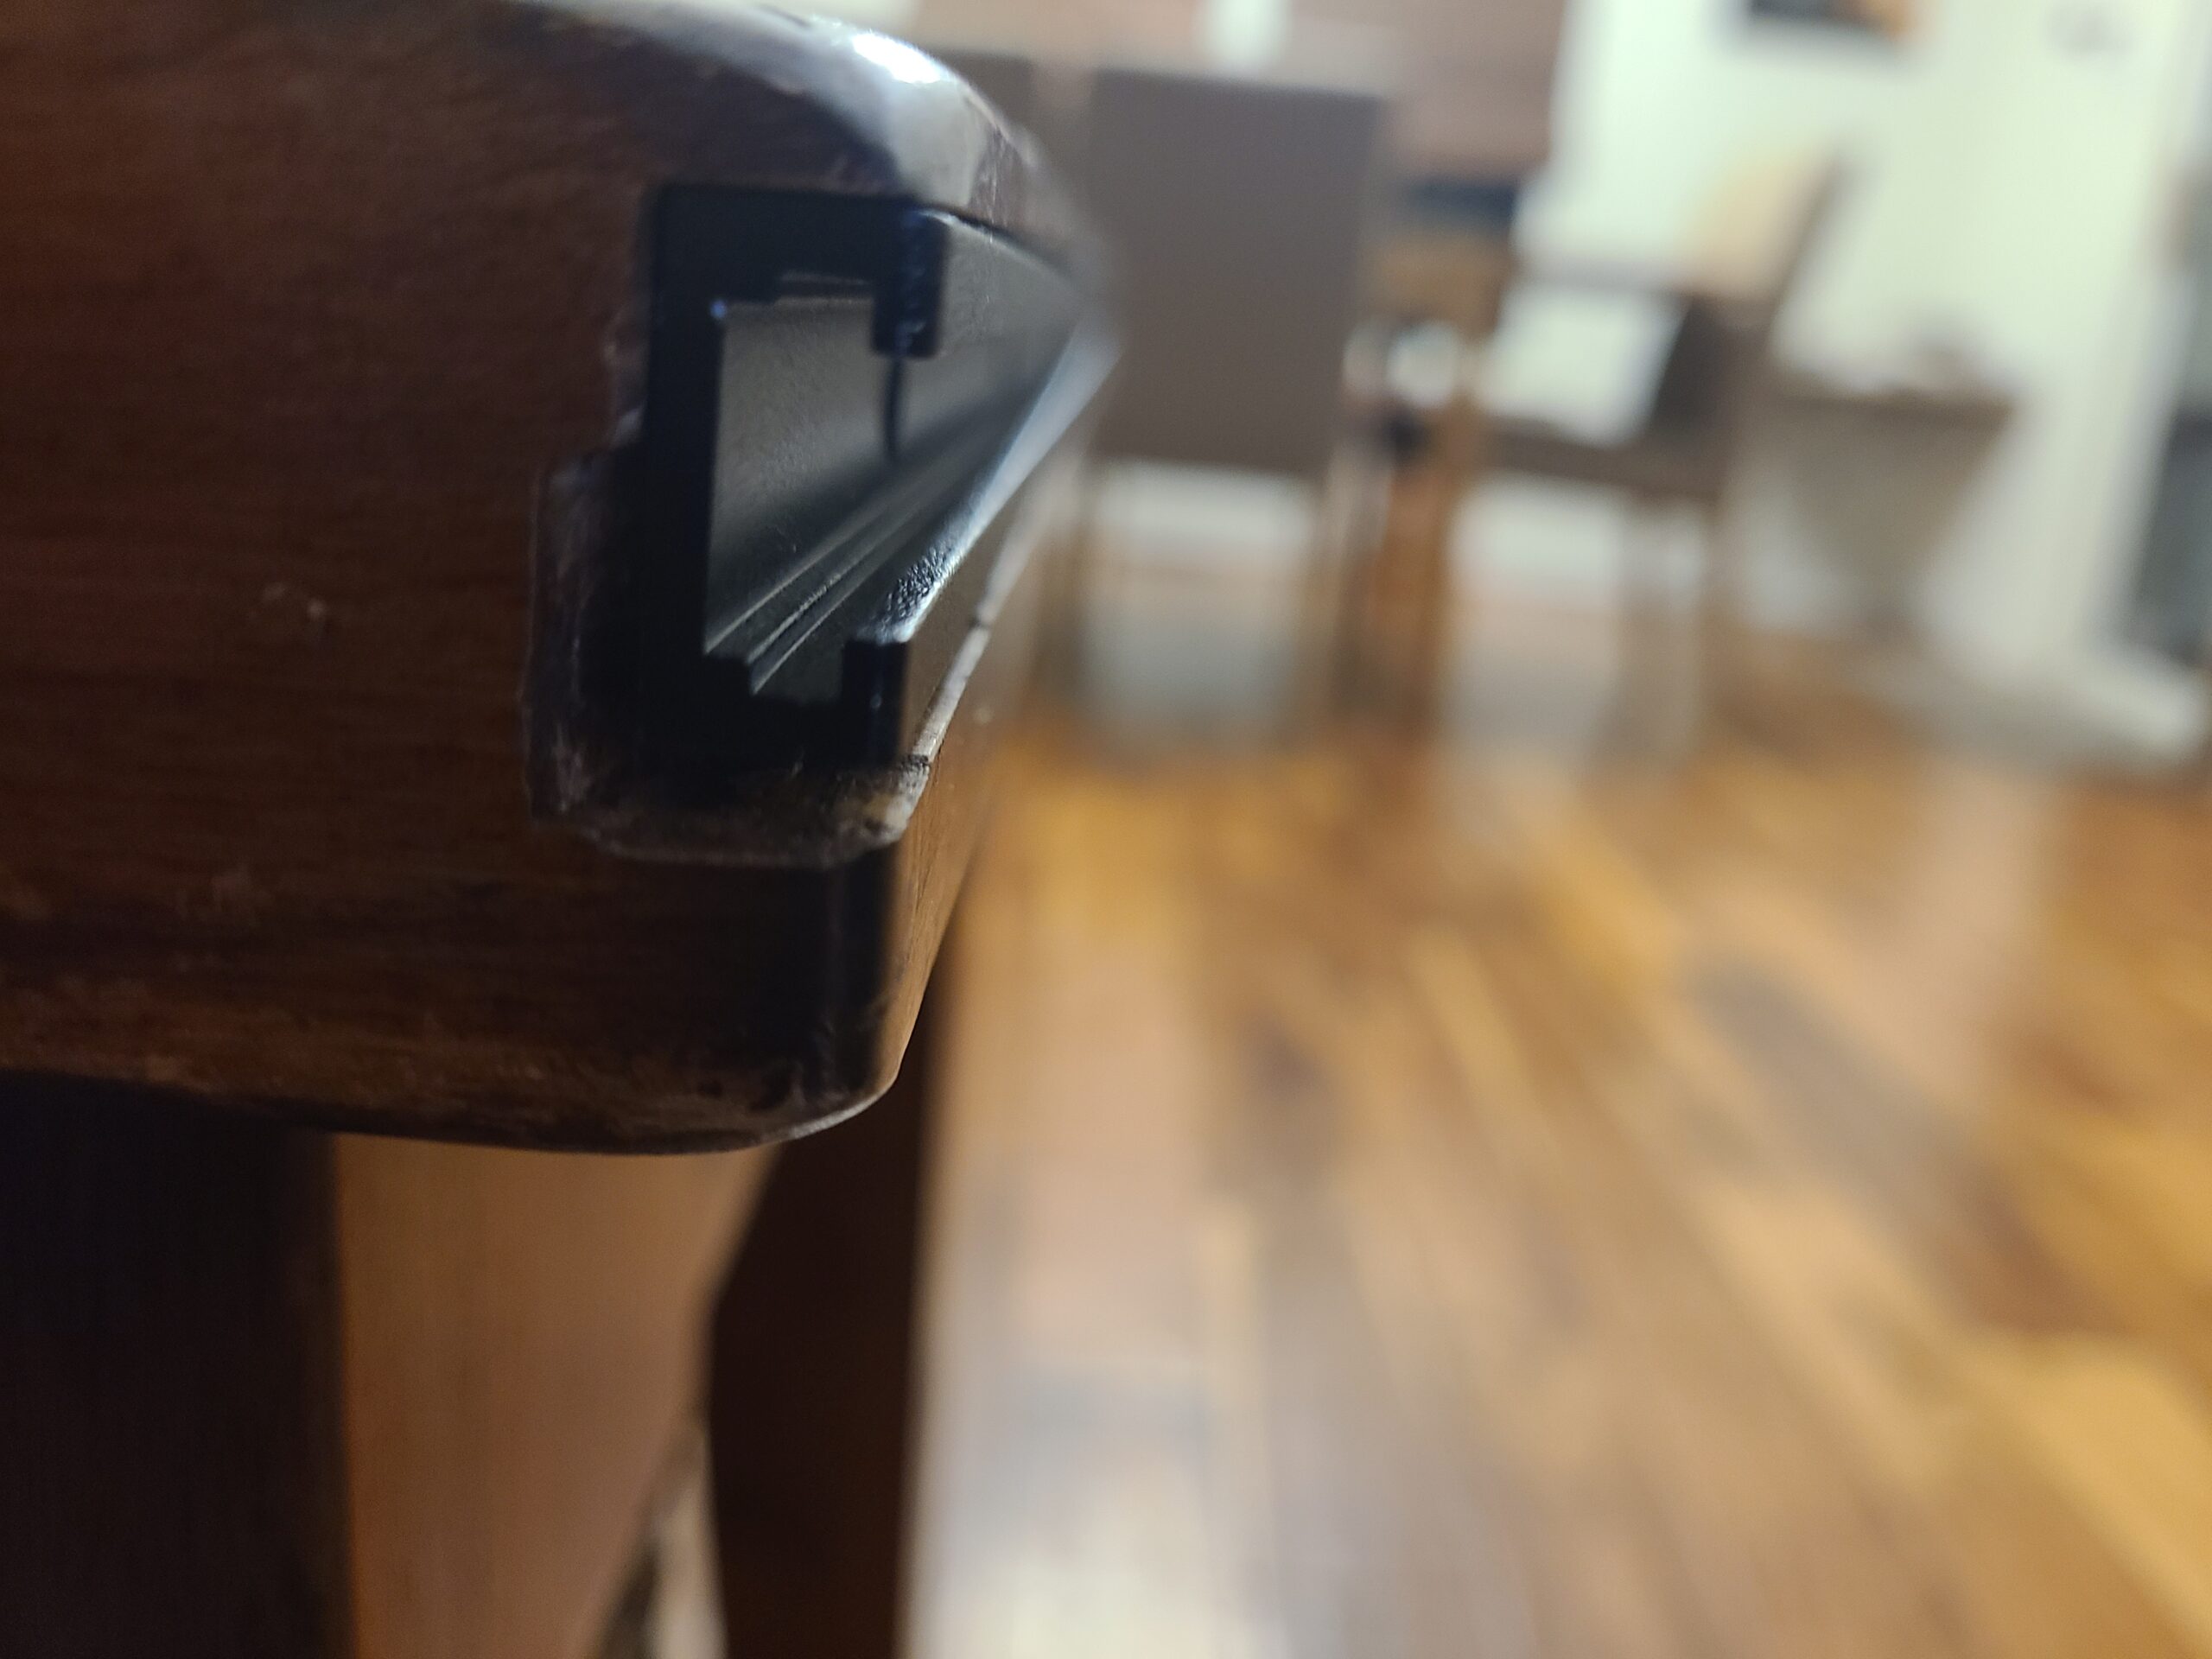
What I arrived at is based on 2ft of black aluminum T-track rail, the kind you’d have in a router table or something to hold a fence or work piece down. I got a cheap router from a thrift shop, and routed a channel into the existing side table, which is beefy wood and stone. I ran a little wood stain down the channel so there wouldn’t be any off-putting white wood peeking out, then screwed in the rail, fitting snug and flush.

The remote holders are 3D printed and have countersunk holes for M3 screws, with some some access holes in front to fit the screwdriver. They accept 3D printed T-nuts with captured hex nuts, then slide down the rail to where ever you want, getting tightened down to a satisfyingly rigid hold.

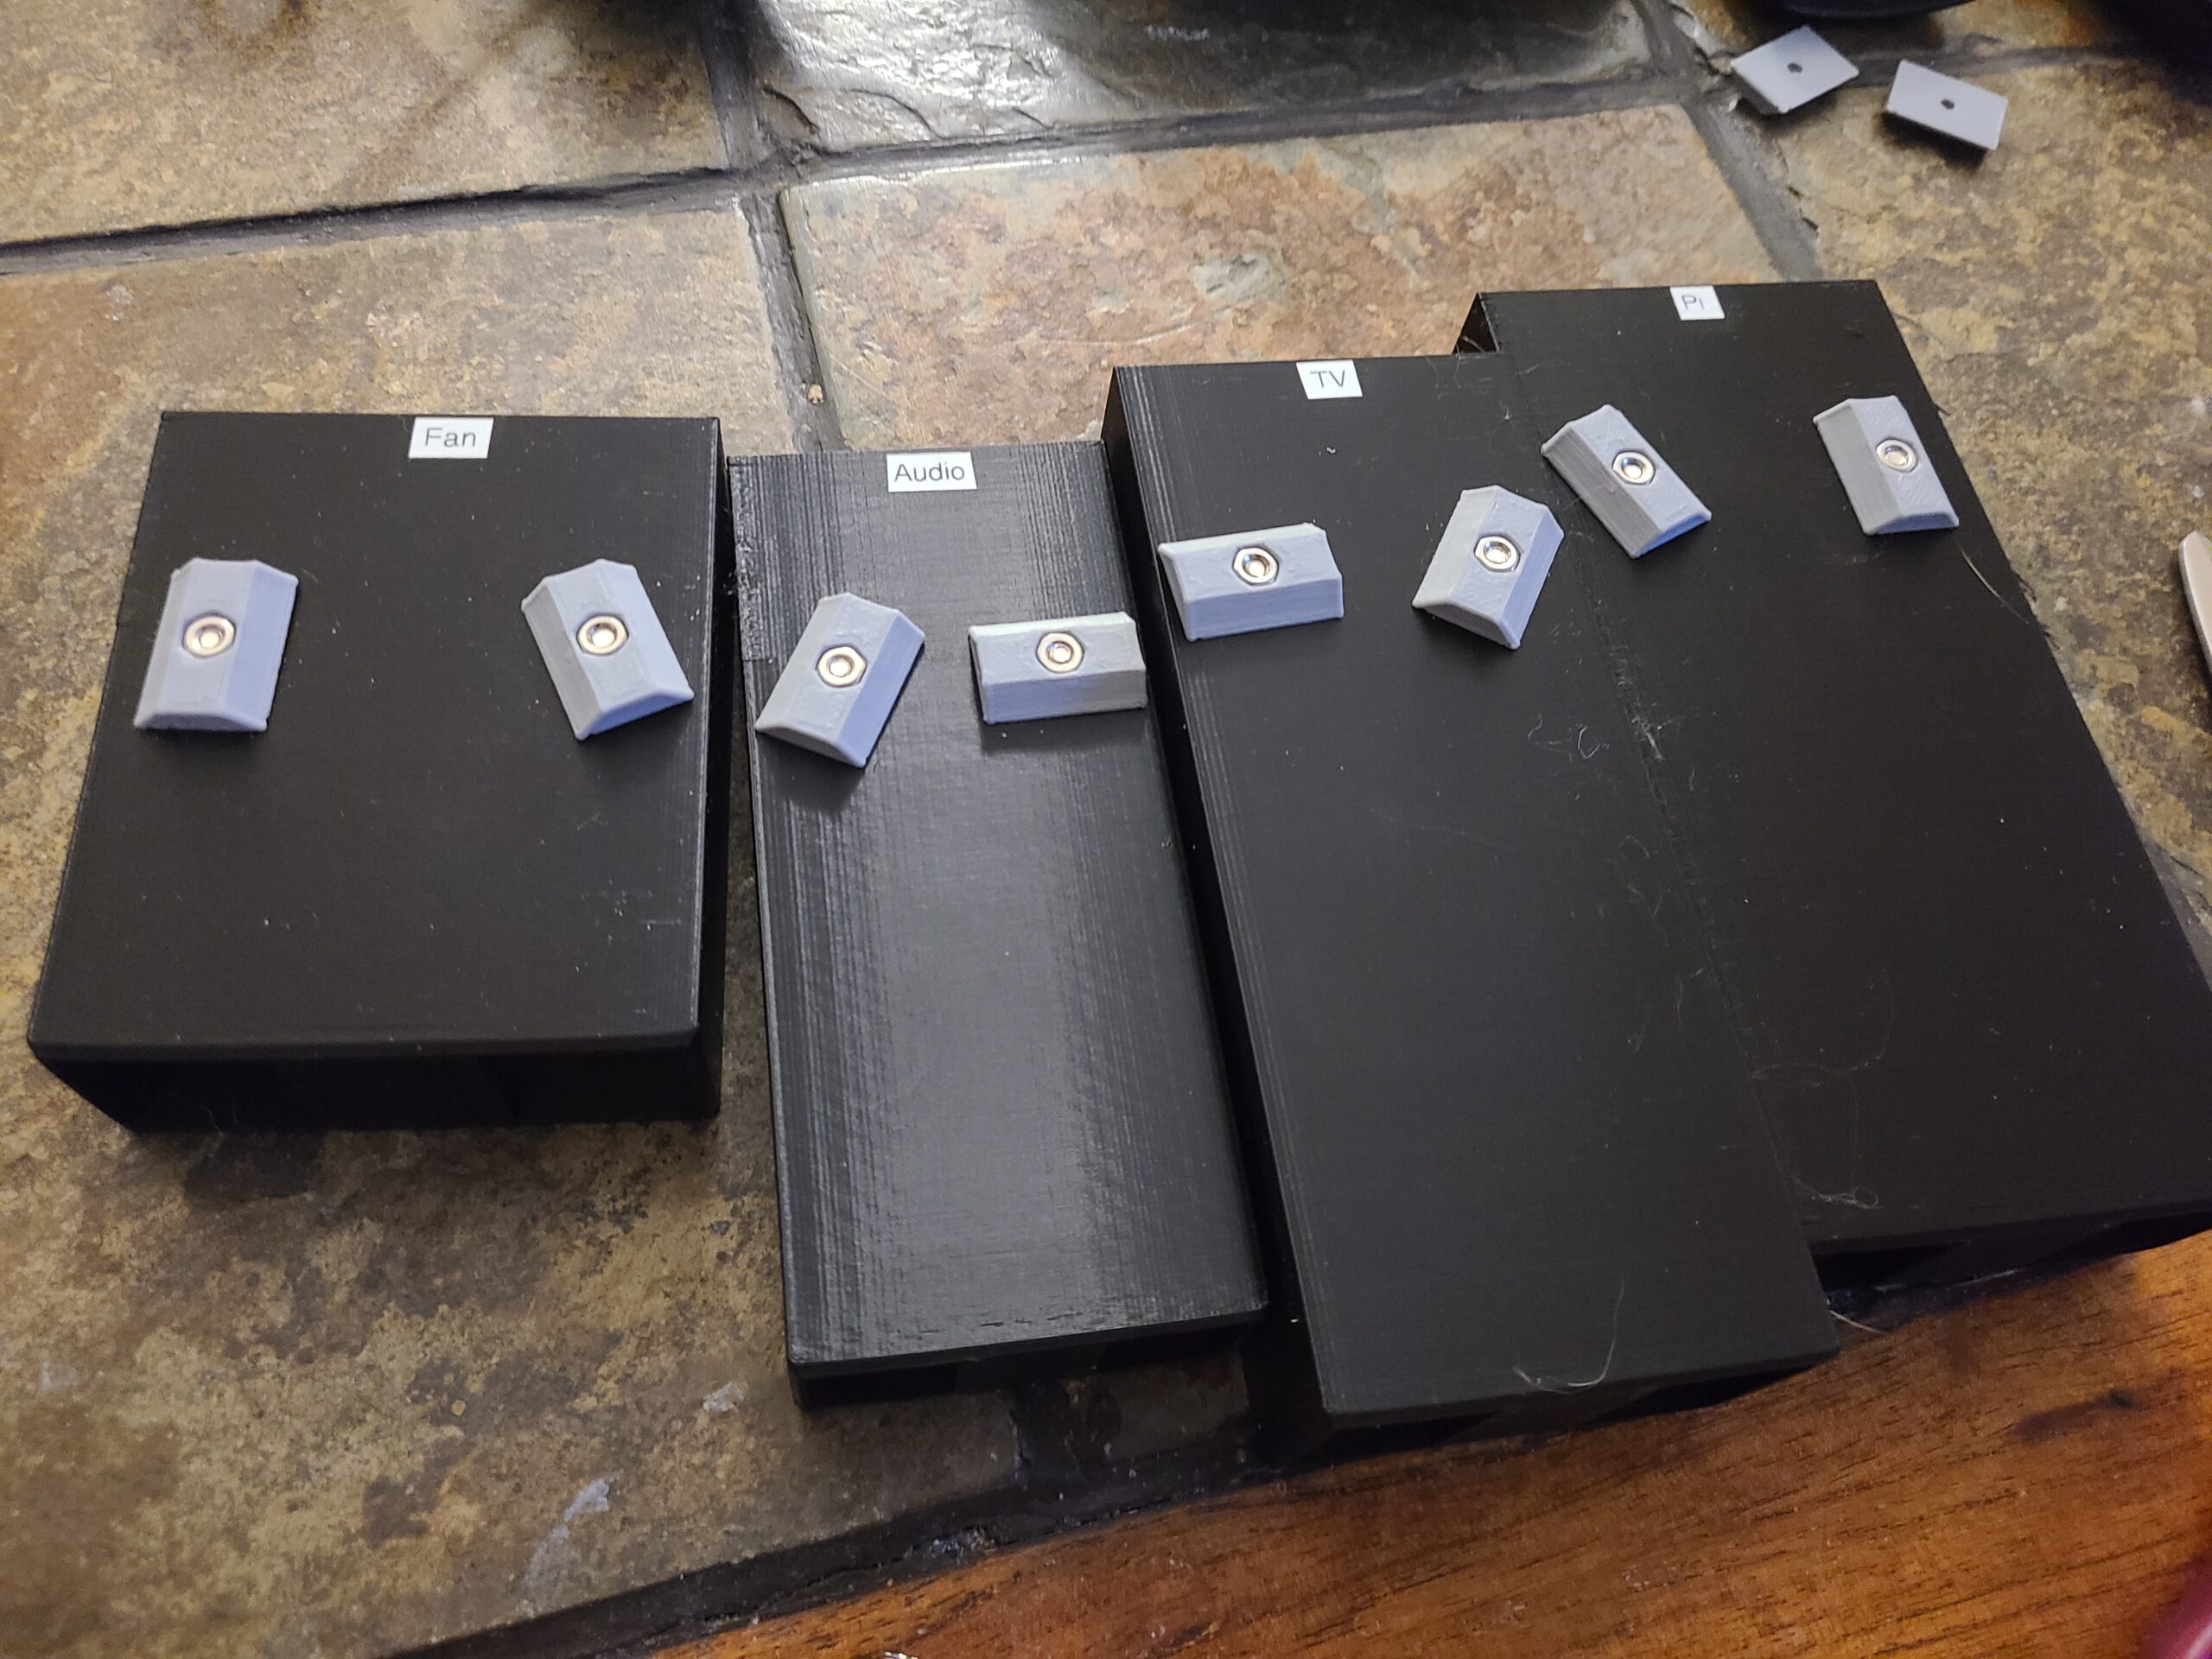
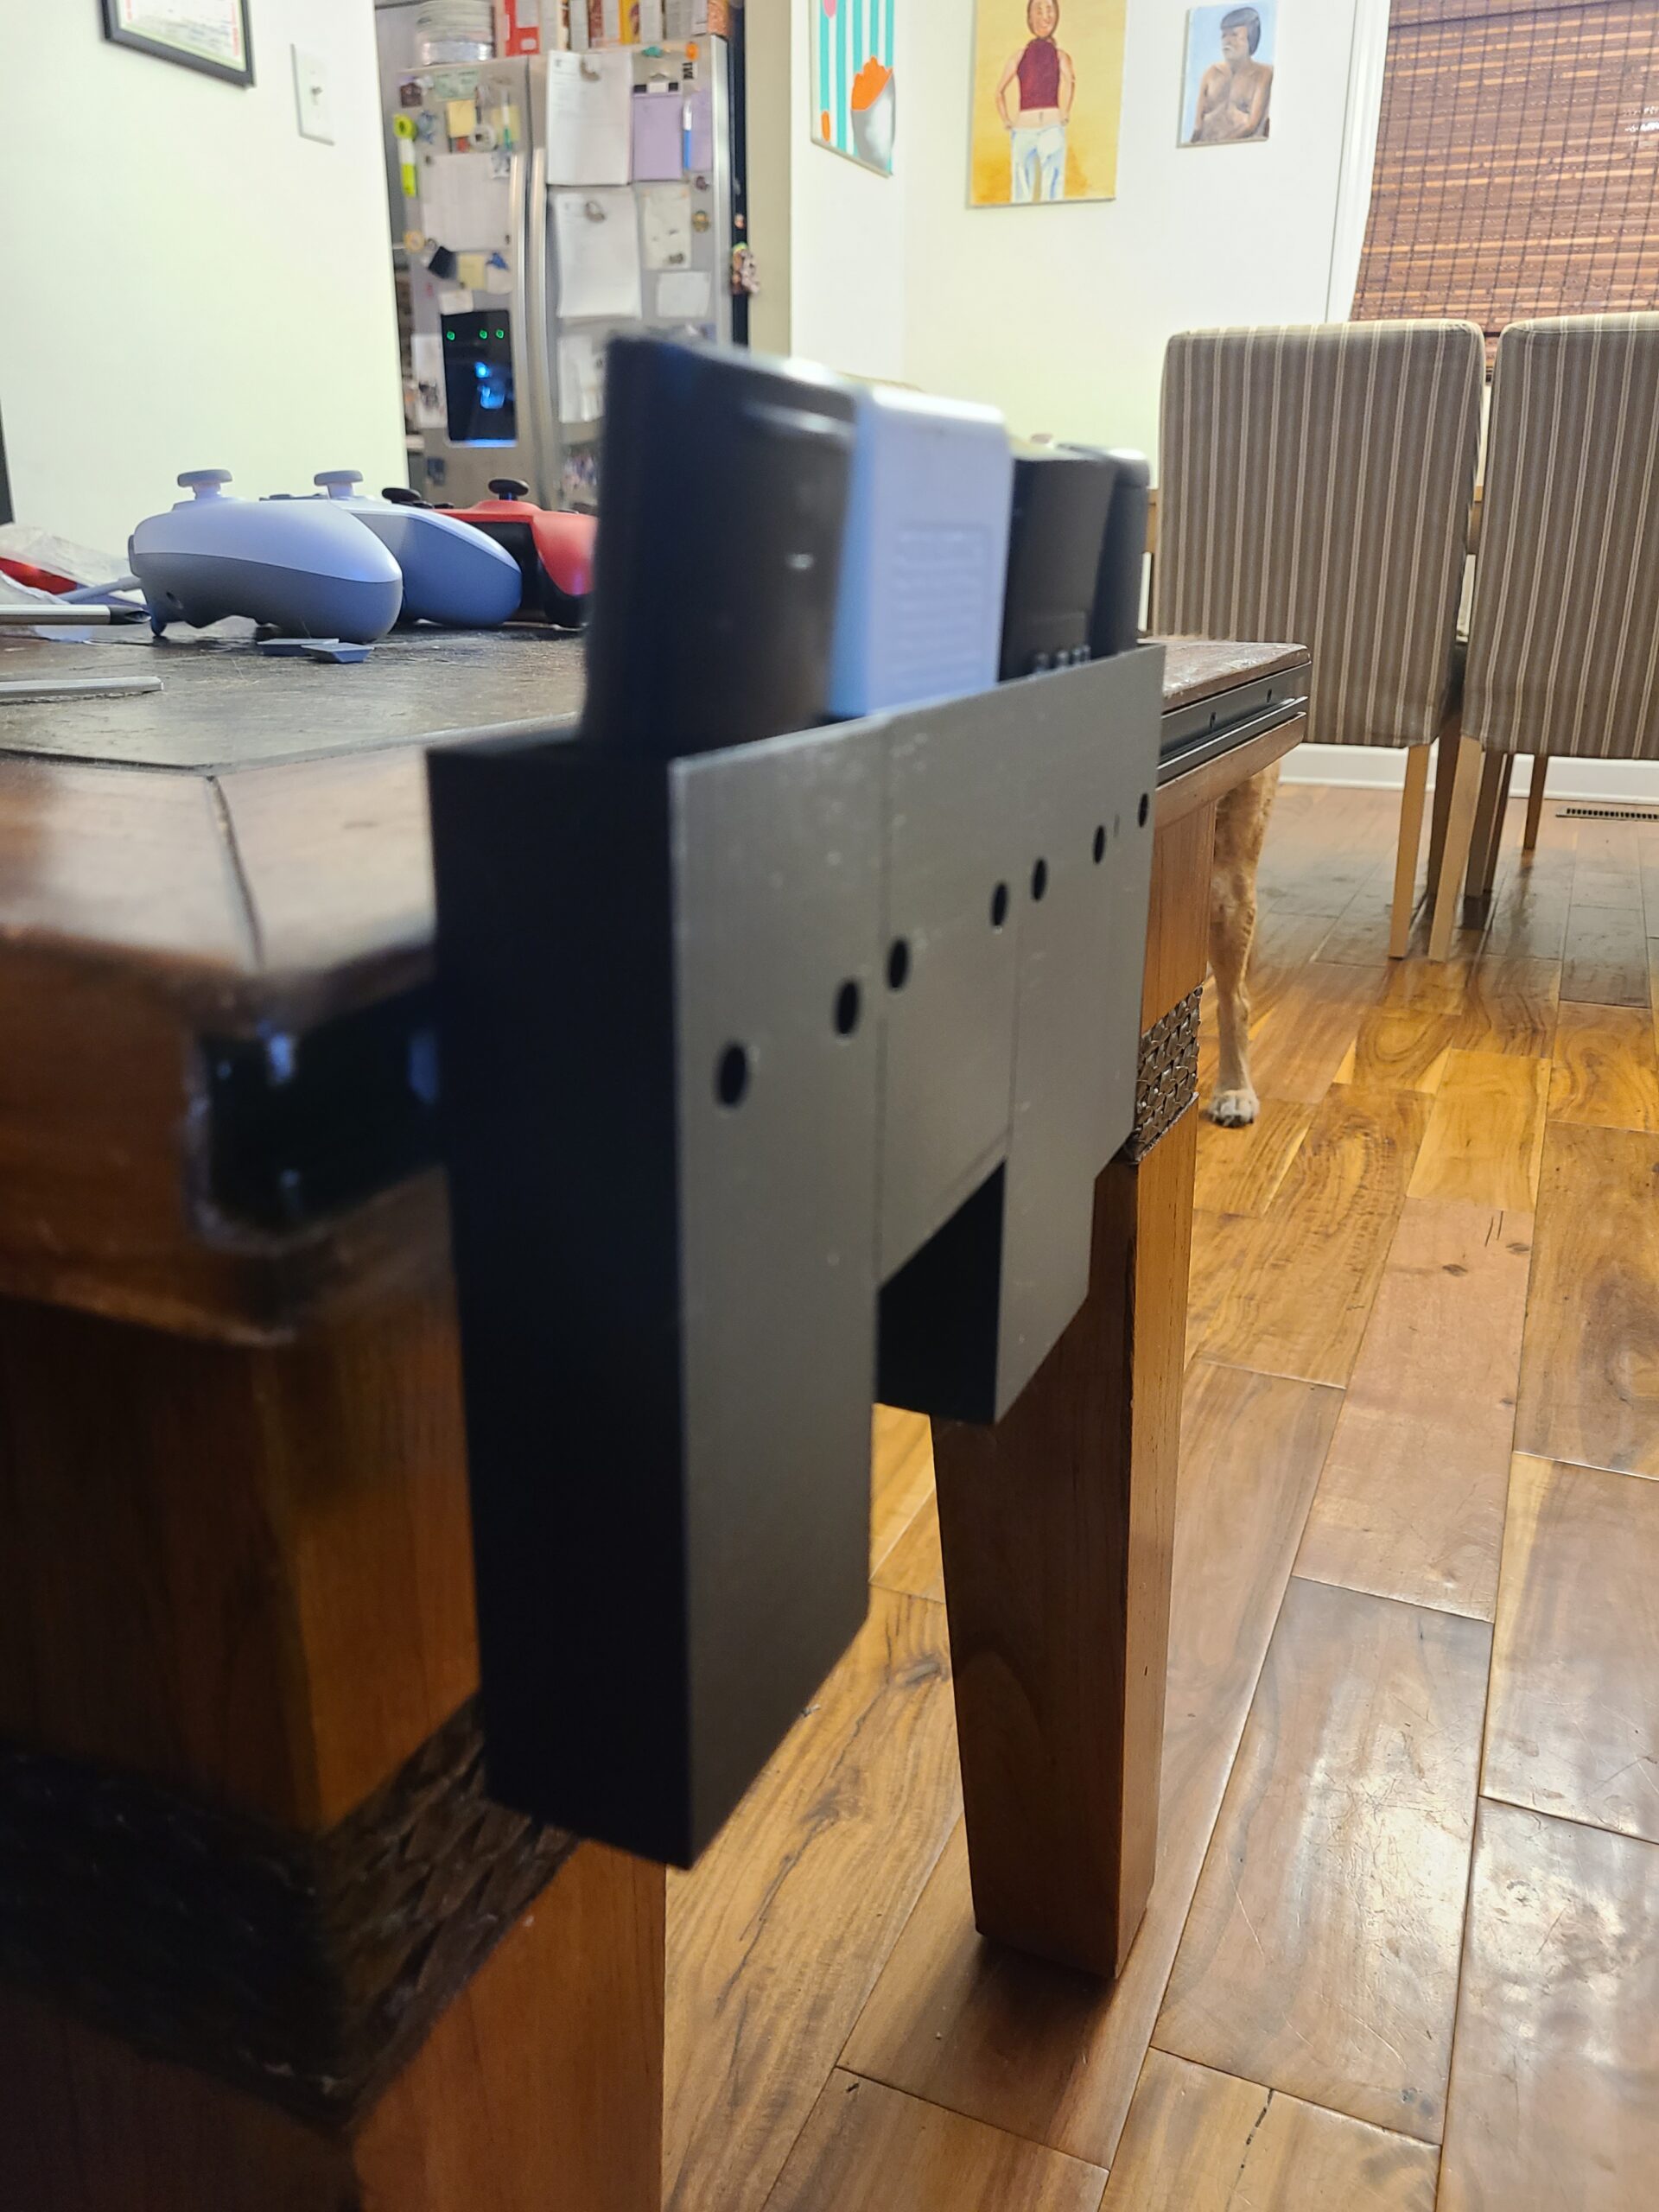
The CAD model (available here) is parametric and configured for the exact dimensions of each remote, so they all stick up to the exact same height, making for pleasing, easy access:

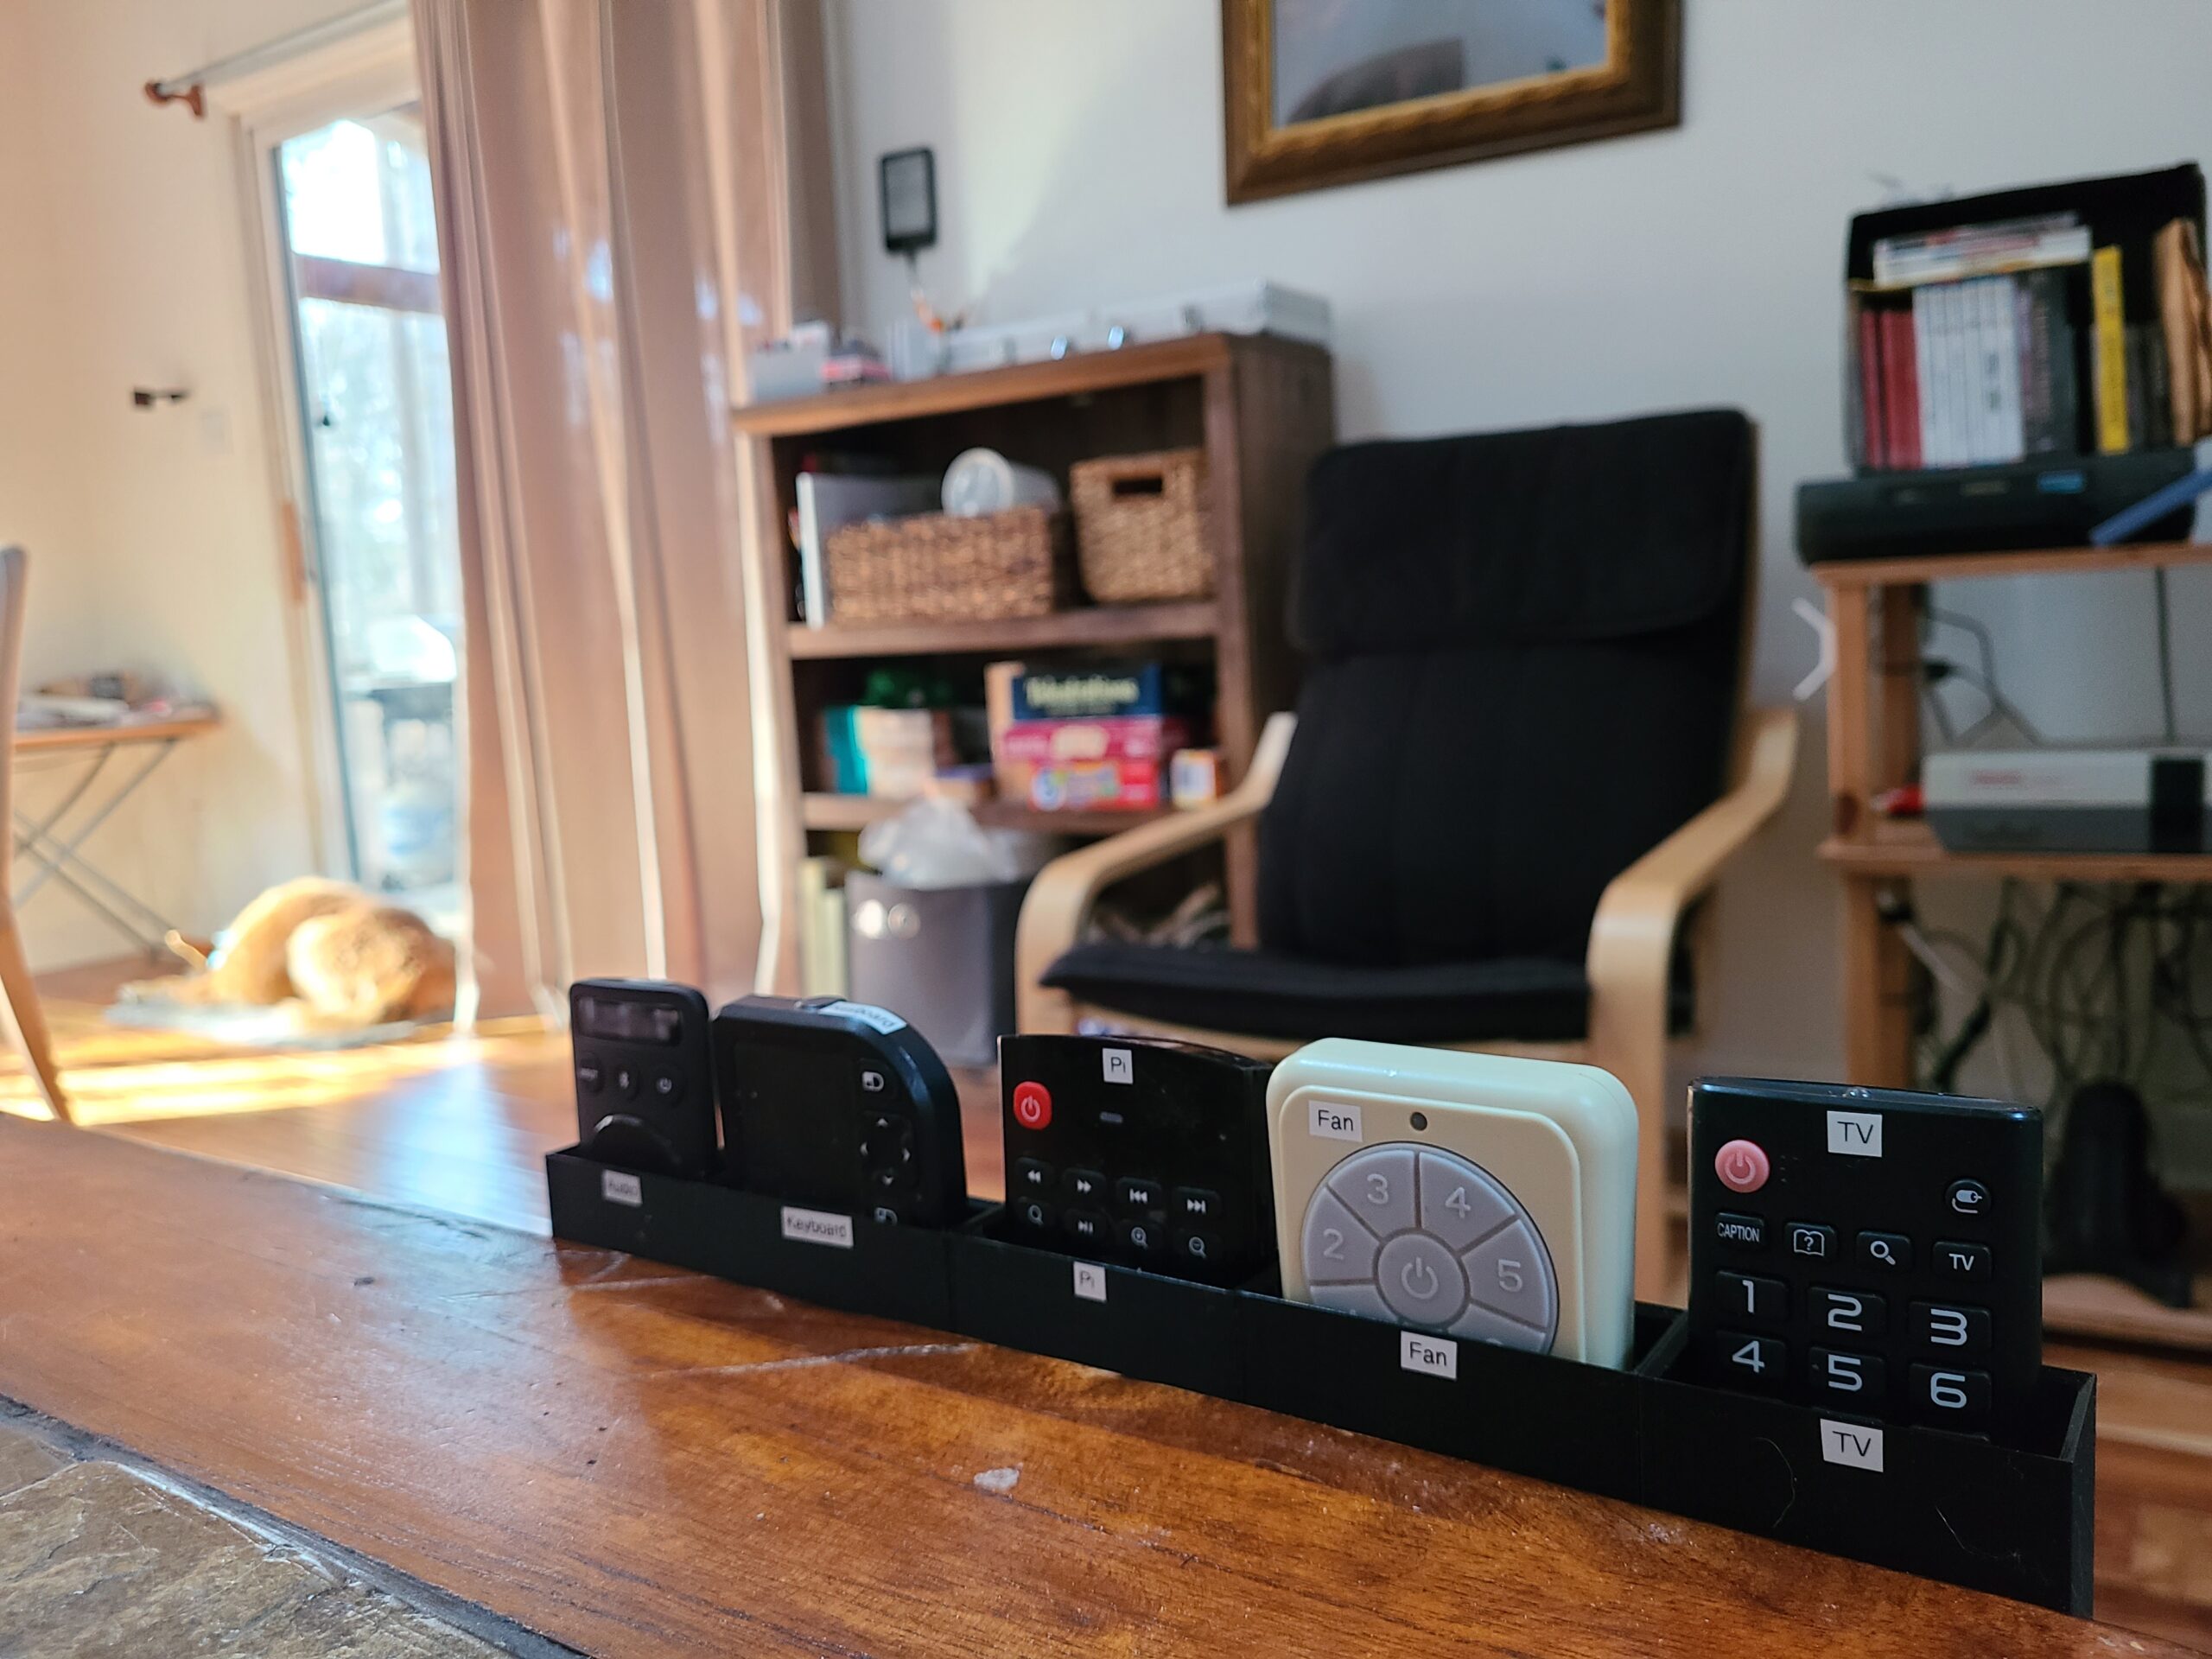
It’s real good. The end.

A 3D printed knife block

I recently got a few new knives, including a really long bread knife, and my old trash knife block didn’t fit them. I designed a new one.

Might be my longest print yet: 55 hours.

Printed in this marble filament.

In order to give it some heft, it has an empty cavity in the front of it accessible via a small 3D printed threaded plug. I filled it with cheap BBs. Now it doesn’t slide around and feels similar to its commercially produced neighbor.

More pics:

Model files: STL file available on Thingiverse. CAD model available for cloning/editing on OnShape.

Open sourcing my little robot

Hey, all. I’m open sourcing my small competitive robot from last year, YellowBot_02, as well as a general-purpose chassis I designed based on it. All are shared as OnShape links (a web-based CAD that works like SolidWorks); you can export STLs from there or fork it and design further. The chassis is covered in a grid of 3mm holes at a 6mm distance; this makes it easy to design accessories in whatever CAD you like and attach with #6 or M3 screws and nuts (or even just zipties).

Last year’s MiniFRC robot, YellowBot_02, was discussed on this blog here. The CAD for it is available here. This CAD includes a mount for the Alfredo NoU and a battery (9V or 6xAA pack), as well a servo mechanism specific to that year’s game. Works with standard yellow gearmotors — they ziptie into the chassis.

Here’s a general purpose chassis I developed from that: ScienceBot. Same hole pattern, but in more places, and no big name on the back. I’m using this design for my undergraduate research students, too. Includes vertical mounts for an Arduino Uno plus Raspberry Pi (the latter not relevant to MiniFRC), a 3×18650 battery pack and 5V regulator (neither relevant to MiniFRC), and three MaxBotics ultrasonic sensors (probably not relevant to MiniFRC). Compatible with all the same mounts and motors as the YellowBot_02 chassis above.

If you want to DIY your wheels, here is a design for two-part wheels with the same dimensions as the stock yellow-and-black ones. There’s an inner hub designed to be printed in regular rigid PLA, and the wheel itself, which is meant to be printed in squishy TPU filament (also known as Ninjaflex).
You can get even better traction if you spray the outside of the wheel with PlastiDip.

Here’s a video tour of the old YellowBot that I did as part of a fabrication tutorial at Duke:

Here’s a video of the new ScienceBot chassis with the TPU wheels doing a motor test:

Introducing YellowBot_02

A long time ago I posted YellowBot, a little robot built in one day. I am now ready to introduce YellowBot_02.

YellowBot_02 is a robot designed to compete in MiniFRC 2019, a quarter-scale version of the FIRST Robotics Competition hosted by the TerrorBytes (FRC team 4561). Design based on the full-size 2019 FRC robot by the RoboGladiators (FRC team 6426). The competition this robot was designed for is a 1/4-scale version of the FRC 2019 game, Deep Space. This particular bot is designed to transport “cargo” (2.25″ plastic ball pit balls) into the “cargo ship” (an elevated depository).

Below is a video of this bot competing in MiniFRC. If you want to see more MiniFRC (including more of this bot), this playlist has many of the matches.

The full write-up on YellowBot_02 is on Thingiverse, including complete sources plus directions to build your own!

Showing off some vintage 1970s LEDs

After seeing this video, I was inspired to hunt down and purchase some early-model LEDs. It turns out you can get Soviet-era gold-plated LEDs from the 1970s on eBay, so I grabbed some of these and made a little thing to show them off.

I did a bit of research to figure out what I had, including browsing scans of 70s Polish datasheets and translating a Polish Wikipedia article to research the now-defunct manufactuer, Unitra CEMI.

The LEDs came from a seller in the Czech Republic and arrived via registered mail (the kind you have to go to your post office to sign for). The actual LEDs are gold plated, and you can see the actual junction clearly inside the lens.

I put two of them into a breadboard with an ATtiny85 programmed in Arduino to do a simple alternating blink pattern. I designed a 3D-printed display to hold it, spliced some USB to power it, and made a little label to explain what the thing was, and now I have a neat little thing to put on the shelf.


Yet more abstract images

I had some new ideas on generating pictures based on Z-order curves. For speed this time, I wrote some truly horrific but decently fast C code to render stuff. I also re-did some of my earlier Hibert curve stuff in C.

The awful code is here.

Pictures below. They look best zoomed all the way in, and the jumbo ones make good wallpapers if set to ‘center’ (no scaling), even on big multi-monitor setups.