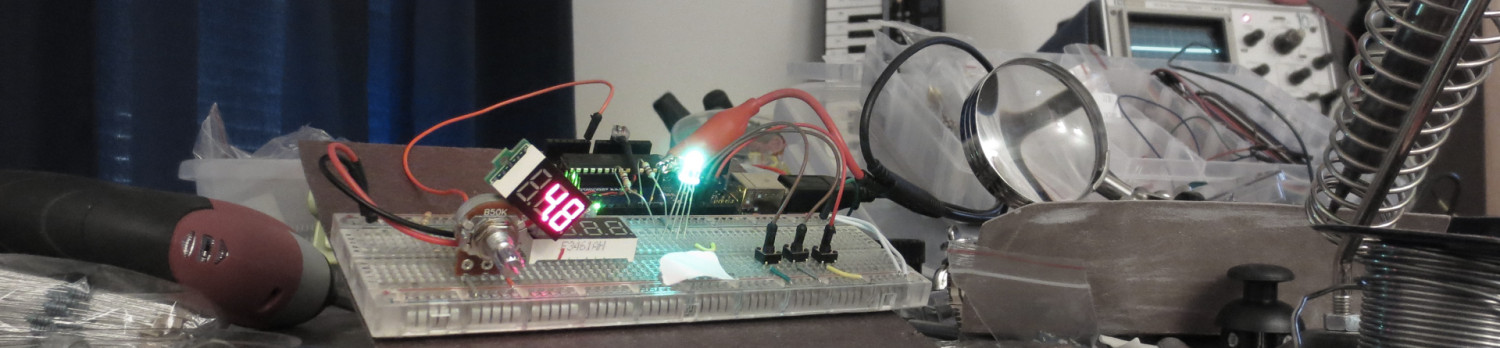
I made one of those floppy drive music things that I keep seeing online.
It’s mostly standard based on existing info, but I did made two somewhat interesting changes. Read on for details.
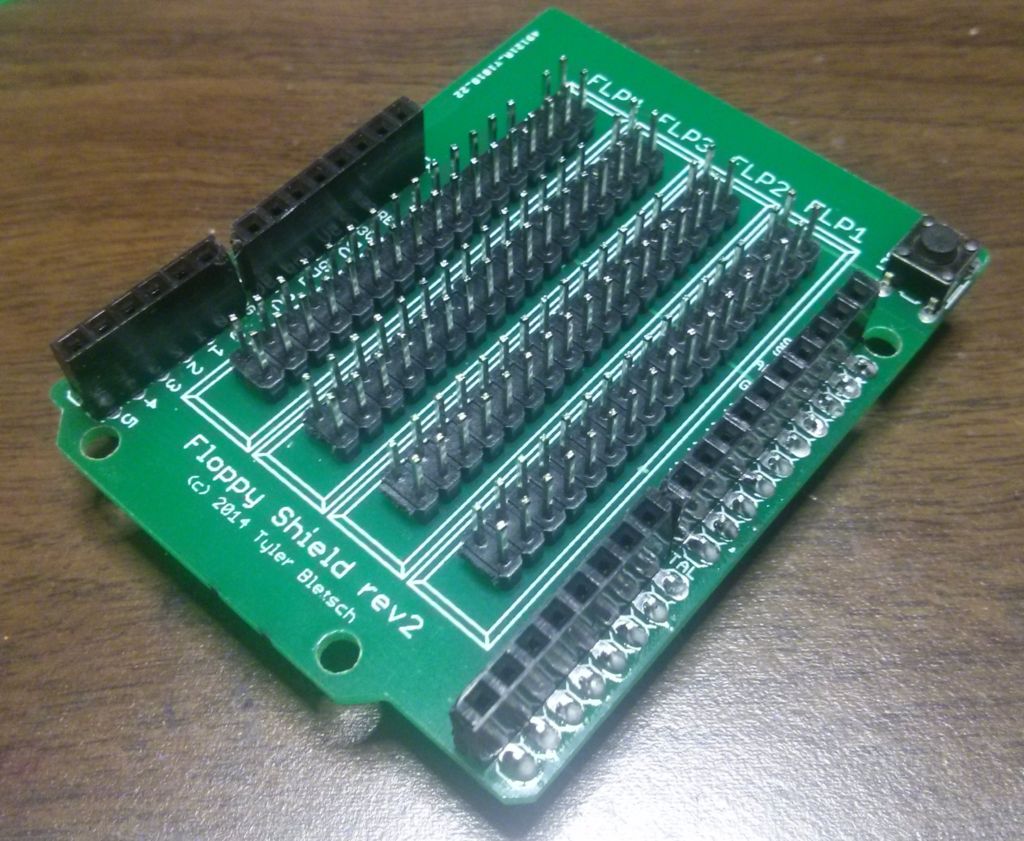
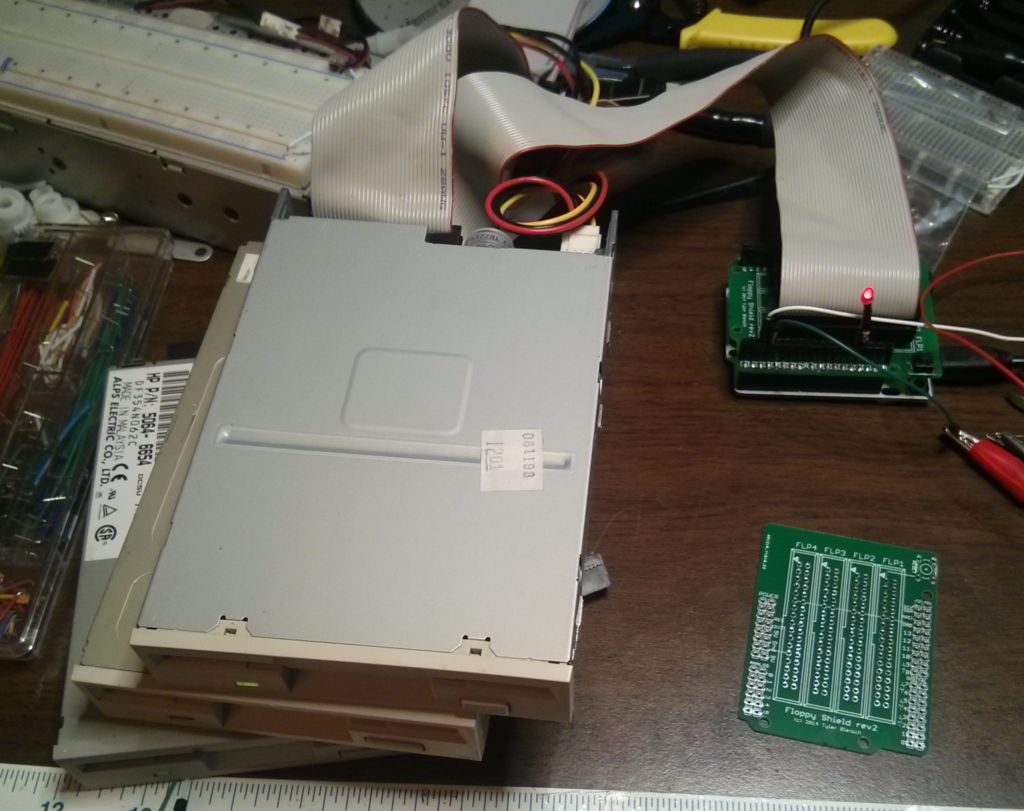
First, made the hookup much easier by developing a “Floppy Shield” for Arduino, so I can just hook up the drives with standard floppy cables. (Want your own? See ‘UPDATE 3’ below for info on getting one fabricated for you!)

Second, instead of hard-coding my floppy routines, I developed a general Arduino library for it called FloppyMusic. This lets you just declare a FloppyMusic object, pass in the pins for DIRECTION and STEP, and it will handle setting frequencies for you.
If you want more info on how to build something like this yourself, refer to the one of the many floppy music tutorials out there, such as this Instructable post, this diskette organ project writeup, or the Moppy project. If you want your own floppy shield, see ‘UPDATE 3’ below for info on getting one fabricated.
UPDATE: Wow, I just found out I got on Hackaday, awesome! Since people might actually try to use this stuff, let me add two things.
First, the floppy cable needs to NOT have a twist in it between the shield and the drive. Basically, floppy cables usually have three connectors: motherboard, floppy B, and floppy A. There’s a twist in the cable for floppy A, but the shield is designed with floppy pin 12 (DRIVE B SELECT) grounded, so you need to NOT have that twist. That usually means using a three-connector cable, and connecting the drive to the middle port. If I were making the shield today, I’d use the more common floppy A connector with the twist by grounding pin 14 instead. Maybe I could ground them both and then either way would work? I dunno… Fixed! See UPDATE 2 below.
Second, I fabbed the shield at a place that did ten boards for a flat rate, so I have 9 more of these boards. If anyone’s interested, just email me at Tyler dot Bletsch at gmail. Is $5 a pop fair? All gone, but you can fab your own! See UPDATE 3 below.
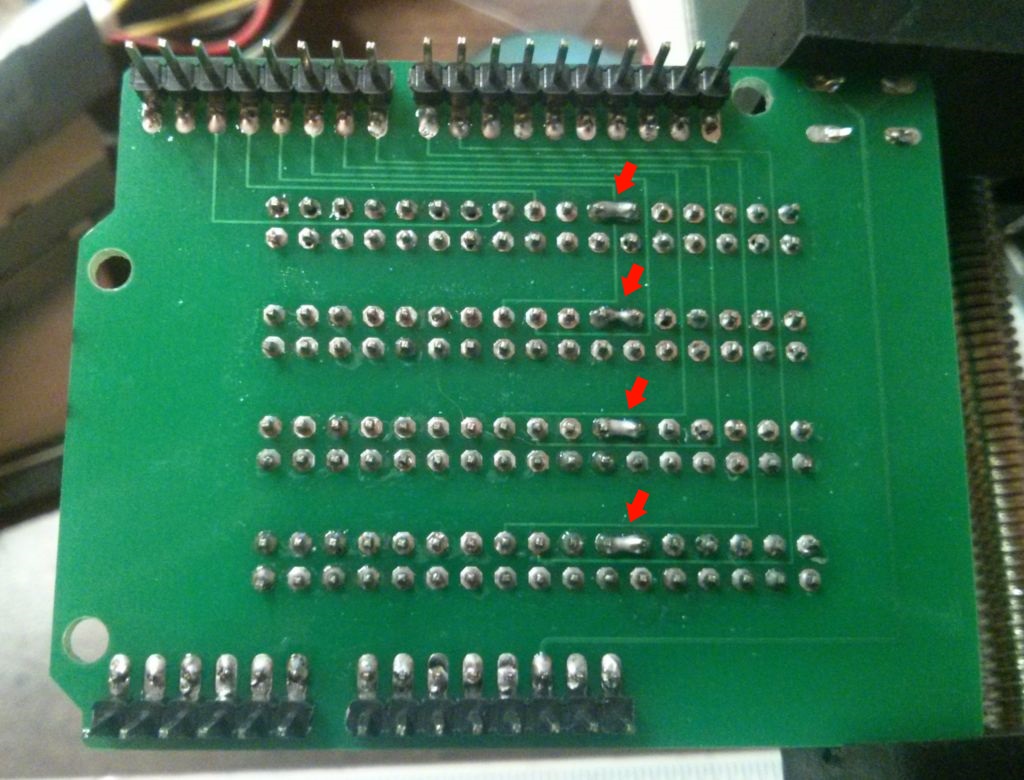
UPDATE 2: I found an easy fix to the “need to use a straight cable” problem — if you just bridge the DRIVE A SELECT and DRIVE B SELECT pins (12 and 14), it works with either cable; you can even have two drives hooked up at once and they’ll play the same note. Pic:
Now that I can use the cables that I have a bunch of, here’s a video of it playing multiple drives:
I’ve updated the board design in the github with this change as well.
UPDATE 3: I’ve sold all the extra boards I had. If you want one of your own, you can download the design and have it fabricated yourself (check PCB Shopper to find the cheapest place). If you want one-click fabrication (and don’t mind paying a little more), you can have OSH Park make you one using their ‘shared design’ system.
If you end up making something cool, let me know! I’d love to see what people do with this design.
Pingback: A Simple Floppy Music Controller
Pingback: A Simple Floppy Music Controller - Tech key | Techzone | Tech data
Pingback: A Simple Floppy Music Controller | Hack The Planet
Pingback: Floppy Music Thing | TLEG
Pingback: Un controlador de discos flexibles que hace música | Francisco Unica
Pingback: Un controlador de discos flexibles que hace música | E7radio noticias, de Venezuela y el mundo
Pingback: Un controlador de discos flexibles que hace música | unocero
Pingback: Turn up the tunes with these Maker music designs | Bits & Pieces from the Embedded Design World