 The masses have spoken! After my wildly successful debut as a blog post writer, Tyler and I have collaborated to create a post so exciting that we may just increase our readership to tens of people!
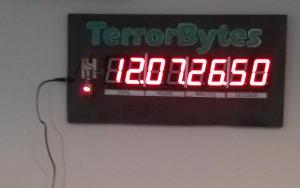
This project started as an idea of Tyler’s. He, my husband, and I all volunteer as mentors for a high school robotics team, the TerrorBytes. The team participates in the FIRST Robotics Competition, which has very strict rules about building times and deadlines. This makes it beneficial to have a countdown clock. Last year, Tyler made one online that we would display at meetings. It was not ideal because it relied on internet and we didn’t have internet that was reliable. Tyler came up with the idea for a physical sign based on an AVR chip and some jumbo 7-segment displays. The result is the TerrorBytes countdown clock!
Read on for the build log.
Tyler designed all the non-visual aspects of the clock. I will let him explain all of that.
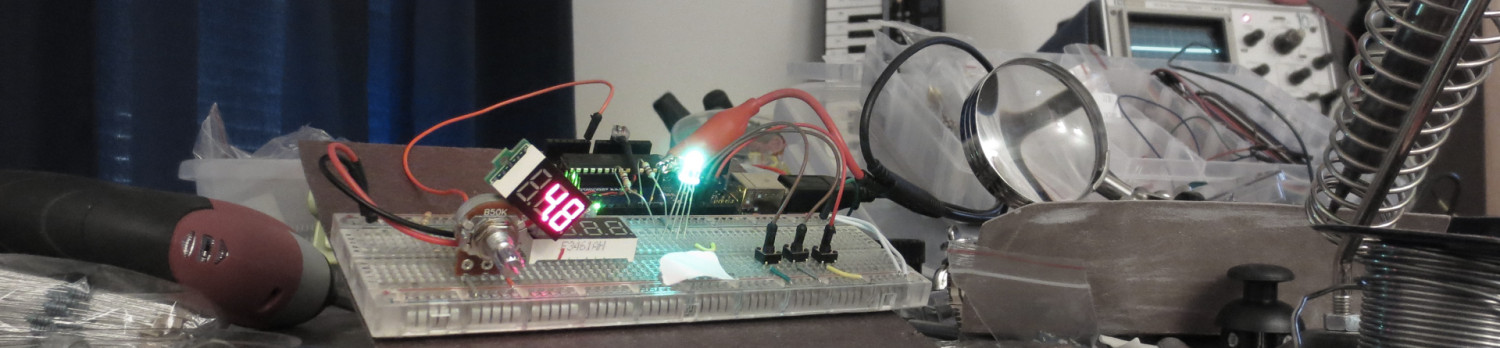
(Note from Tyler: I’m too lazy to do a big writeup. The short verison is that I bought cheap jumbo 7-segment displays online, drove two at a time with a WS2803 LED driver IC, and made 10 instances of custom PCB with angled connectors on either side so they could be daisy-chained. It’s controlled with an ATtiny84 on another custom board, similar to the Axe Man Clock.)
The first thing I did when I jumped on this project was to solder all the components to the circuit board. I had been half-heartedly trying to learn for a while. I had been struggling, but I decided that I would NOT let the soldering iron defeat me the way the bunsen burner did. These electronics projects have been great practice and I have pretty much become the soldering master. Here are some of my soldering tips that you can use in your work:
- Pull your hair back– If you don’t have a hair tie, Tyler might have a hairclip he found in a parking lot that you can use (true story)
- Don’t put your face too close to the soldering iron– While compensating for my poor vision, I inhaled too many fumes and had a bad sore throat and cough that night.
- Drink a beer for steadiness– Tyler learned this technique from a random dude on the internet. It was a little too early for drinking, so I didn’t drink the whole thing, but half a beer seemed to help my hands shaking.
- When in doubt, add more solder– That’s what I kept doing and it seems to turn out okay.
Here is a picture of me in my soldering element.

After everything was soldered and all was programmed, it was time to create the physical and visual elements so it would be presentable enough that we could hang it in our lab. Here are the initial concept drawings.
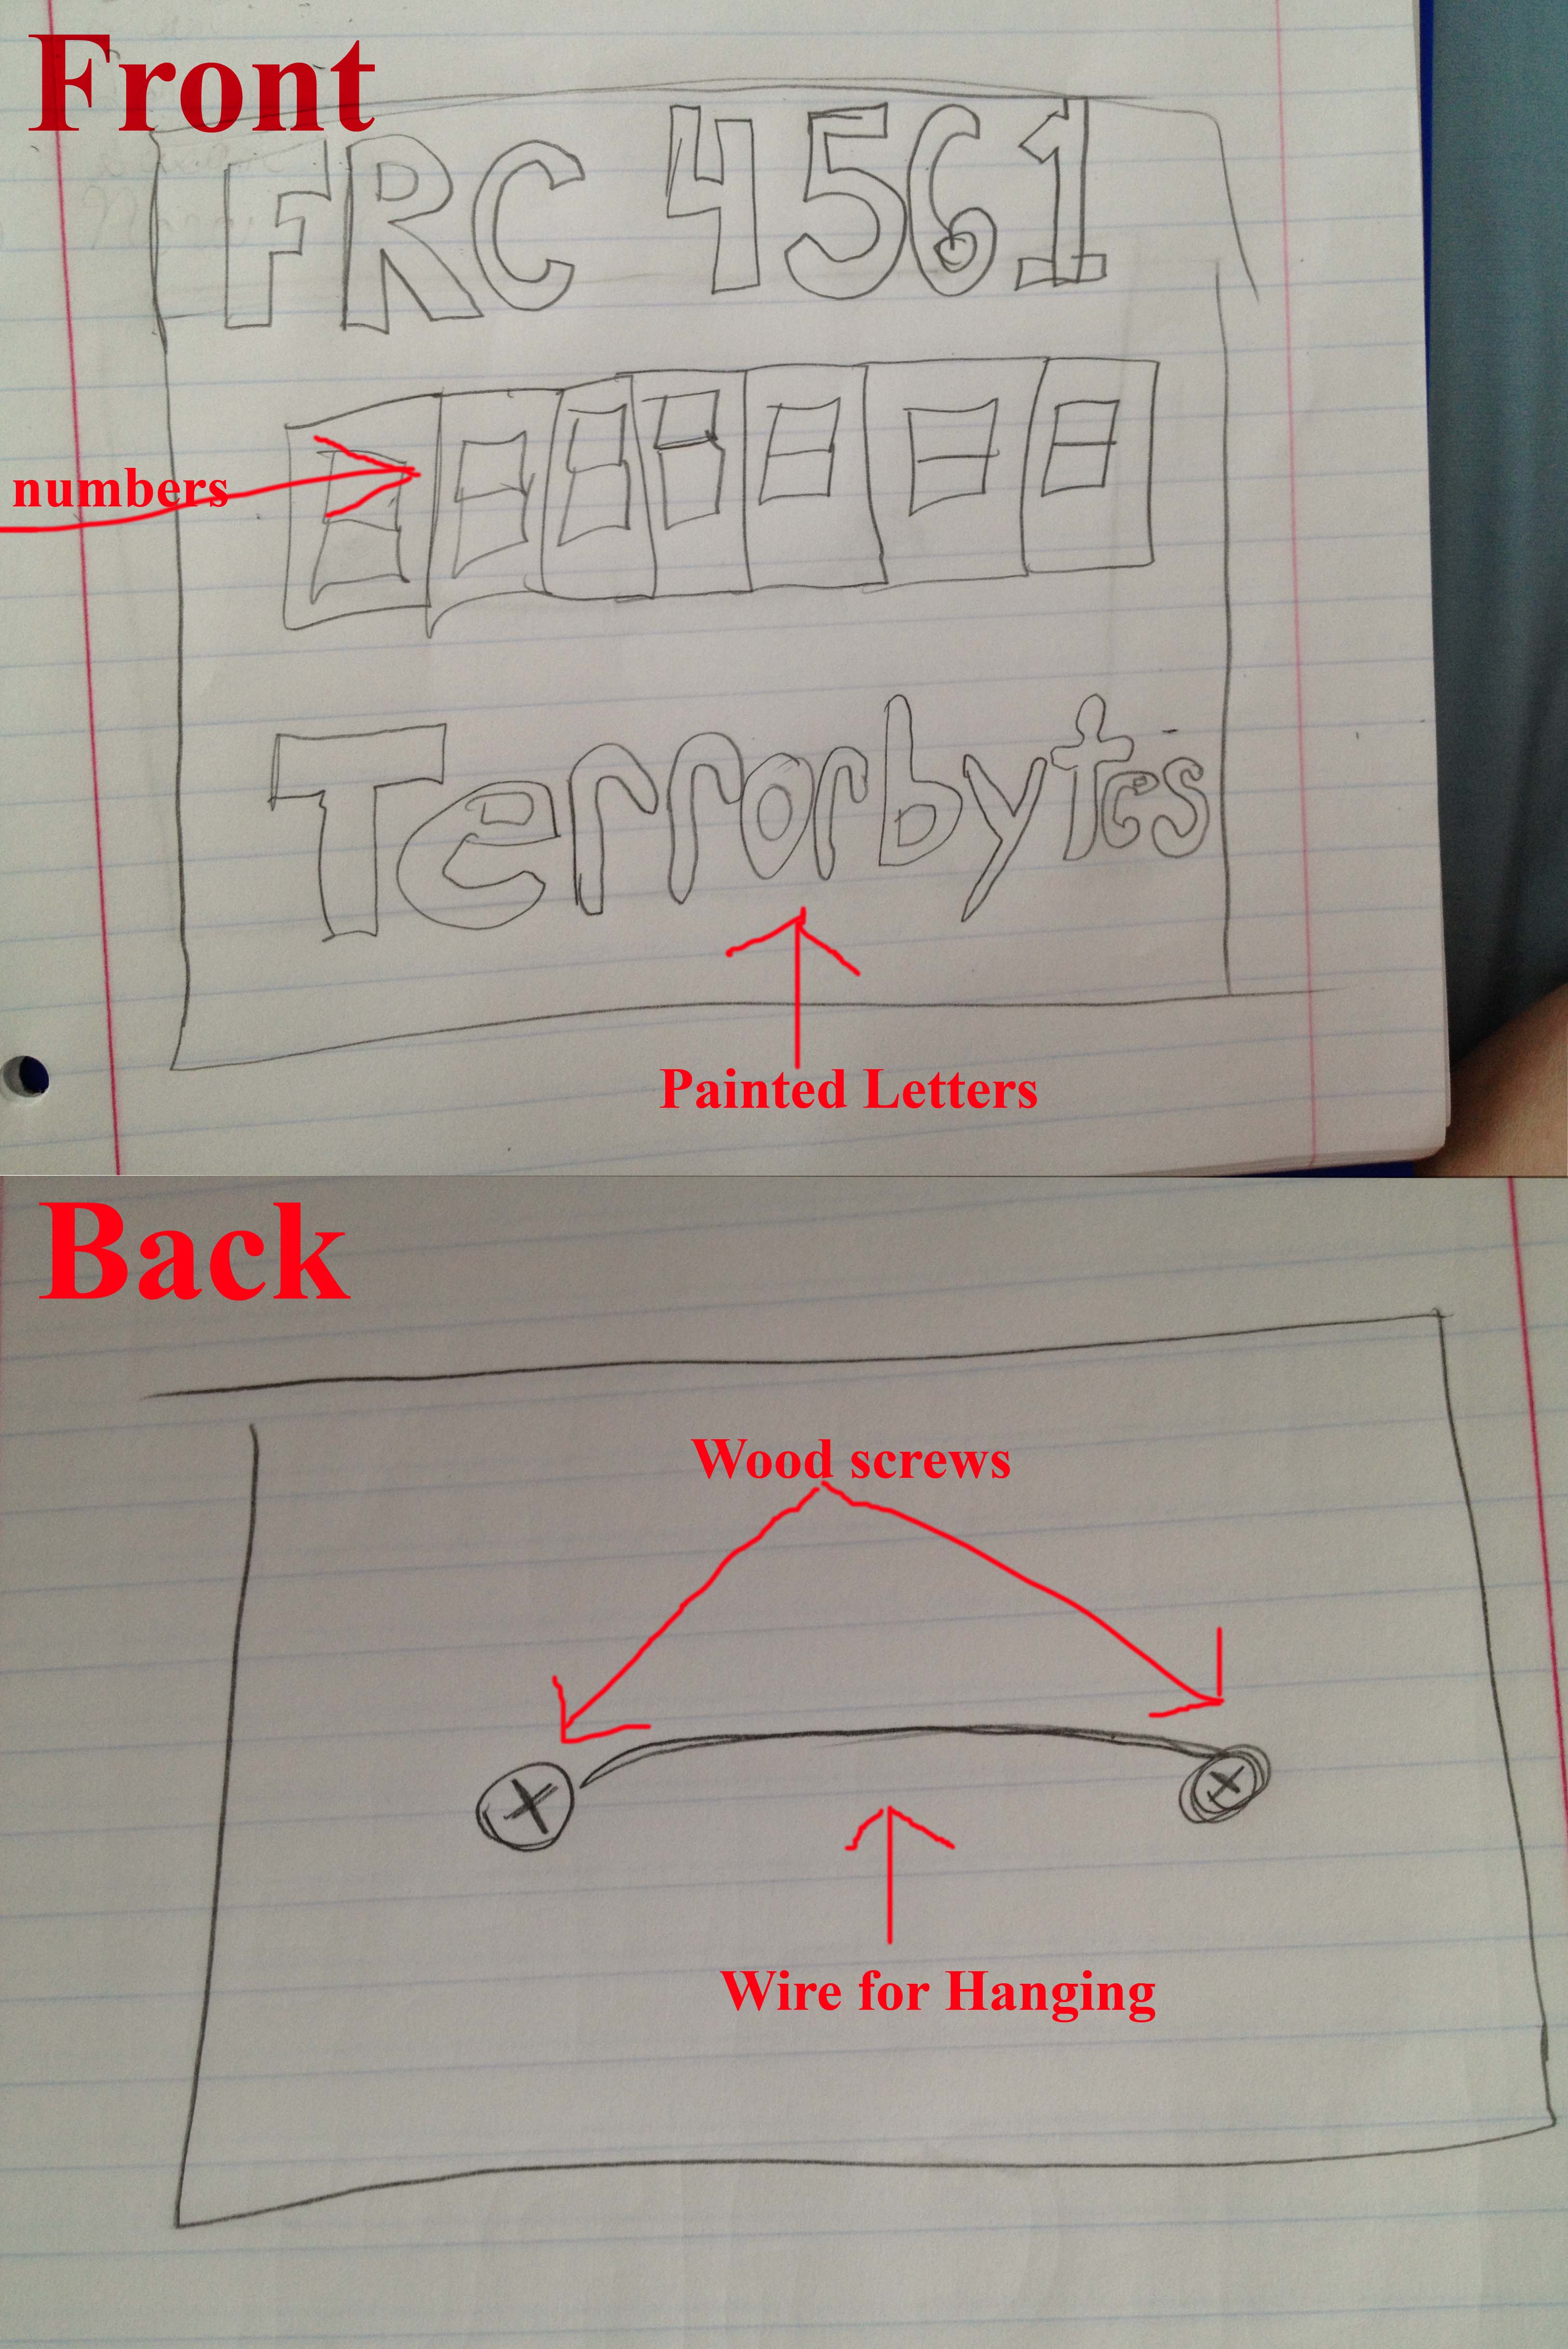
Despite receiving these drawings, Tyler agreed and we met to try and make this thing happen!
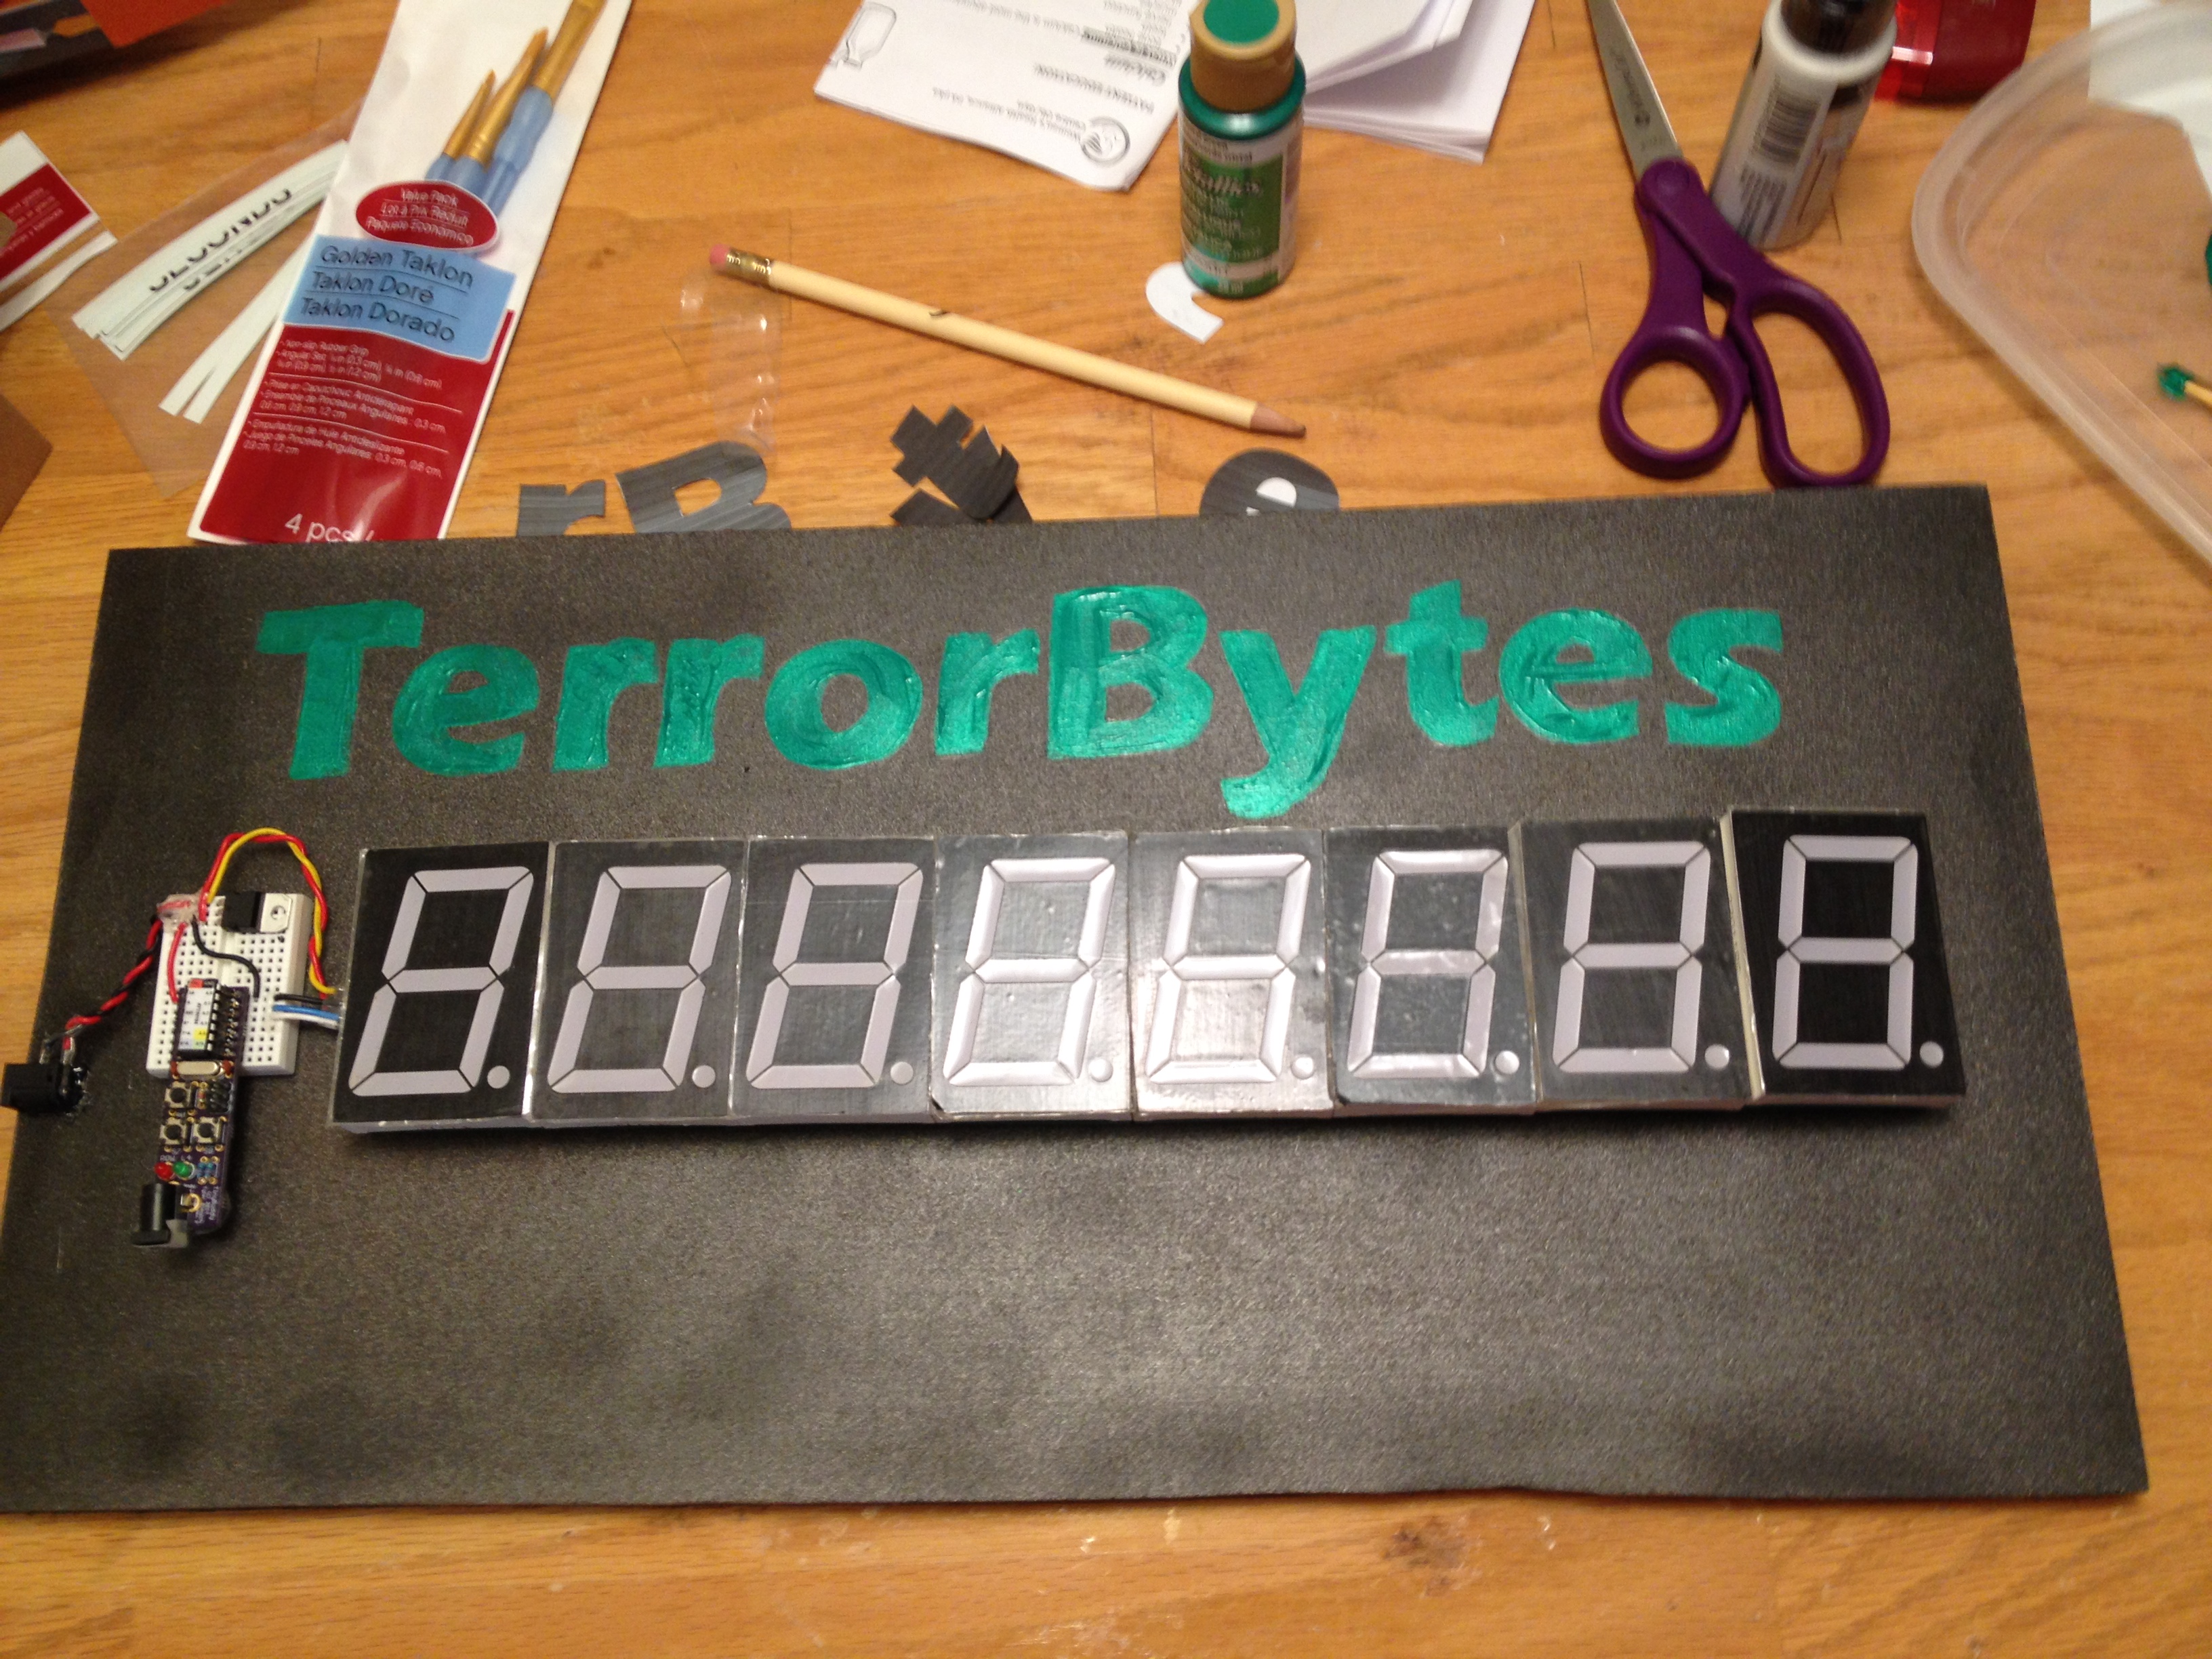
We started thinking of materials we could use to construct the clock. We needed something flat, something to attach the clock to the flat thing, and some way to make letters on the flat thing. This is where Tyler and I encountered artistic differences. I wanted something that looked cool and modern that we could proudly display to represent our team. He wanted it to look like crap. He enthusiastically went to his closet and pulled out what seemed to be a large box of garbage. It was full of random materials he has collected over the years, none of which looks new or well-cared for.
I tried to be a good sport and I looked through the box, but in the end my artistic vision won (I insisted) and we ended up with MDF for the main part of the sign. We cut down the MDF using a newly acquired tiny jigsaw. Tiny jigsaw worked very well, but we managed to cut one of the edges a little uneven. We never could get it perfect and it is still driving me crazy, but Tyler said it was “good enough,” and that is the unofficial robotics slogan. Then we spray-painted the wood. I chose a dark silver color. We had to wait a while for the paint to dry so we entertained ourselves by playing one of Tyler’s favorite games.

Tyler is almost always far better at video games than me, but this time, I had my experience on elementary and middle school math teams in my back pocket. He still beat me overall, but I definitely could hold my own, and I think I could beat him now that I don’t need a few rounds to learn the game.
Then it was time to assemble everything. I put the numbers where I wanted them on the board and marked the holes in pencil. If you are replicating this project at home, I would recommend that you don’t paint your project the exact color of graphite. It makes it very hard to see pencil marks. As a result, I had mismeasured the holes and we had to do a little maneuvering to get the pieces on.
Now I am going to explain a process that I came up with that I am very proud of. I have never been able to draw. I don’t know why. I have always been artistically inclined and I have done a lot of study in the performing arts. I like going to art museums and making things, but I can’t draw. I have a degree in music education and in my practice teaching, I realized that I was expected to make visually appealing things, such as bulletin boards, so I came up with this way to add beautiful letters to things easily. The steps are:
- Choose a font

- Make the font the correct size- this can be accomplished by setting the zoom in Microsoft Word to 100%, holding whatever it is you will be painting next to the monitor, and then sort of guess.

- Print the desired letters and cut them out- it is better not to use an old inkjet printer than is almost out of ink
- 4.Assemble materials pictured

- Trace letters in the desired location using a pencil- yet again, this is best done on a surface that is not the exact color or pencil lead

- Fill in traced letters with paint- I recommend a paint brush with a slant. It makes it easier to paint clean lines
- Outline letters in another color, if desired

So there you have it. Follow these steps and you will beautiful hand-painted letters. The last step was drilling two screws into the back of the board and using a wire to hang it.
There you go! A completely home-made programmable countdown clock. Perfect for robotics team and home use!